LONG EXPOSURE
San Freelance Photography


Disclaimer | Privacy | Copyright | Areas Covered | Contact
© 2009-2013 sanfreelancephotography.com. All rigths reserved. Managed by SmartMinds Solution Sdn Bhd.
© 2009-2013 sanfreelancephotography.com. All rigths reserved. Managed by SmartMinds Solution Sdn Bhd.

Long Exposure Tutorial
They may look complicated but they are not. It is not the simplest and easiest photography techniques but I assure you that any photographers, beginners or intermediate, should be able to shoot Long Exposure Photography. This simple tutorial is set to guide you in your new adventure of Long Exposure Photography. This may not be comprehensive, which I advise you to read relevant books and articles (such as from Lee Frost) to get a better understanding.
Lets start with your "Gear". What you need to start with Long Exposure photography. The "Must Have" and "Good To Have".
MUST HAVE:
Camera - Any DSLR camera. I am not specific into any brand or size of sensor but preferably of latest technology with low noise sensor. It is important that you camera is not too old that it suffers severe color noise from long exposure. This doesn't mean that your old cameras will not work. They work. As mentioned earlier....."preferably".....
Lens - Long exposure is normally associated with wide angle view. Thus, wide angle lenses are more useful than those long lenses. Places where you shoot long exposures are not conveniently next to your car or your house that you have the luxury to carry heavy lenses. My preferred lenses would be 24mm, 17-40mm, 24-70mm.
Tripod - This is probably the most critical none-electronic item you need for your adventure. The heavier the better (this contradicts with my statement of traveling light). Firstly, do not use that free gift tripod from the camera shop, aluminum, light weight tripod. It doesn't need strong wave to topple it, a strong wind would do....and it vibrates every time you release the shutter. I have many tripods for different purposes. For long exposure photography at the beach side or river or anything involving contact with water, I prefer stainless steel tripod leg. It is heavy yet steady. Otherwise I will carry carbon steel tripod or adjustable tripod legs (Velbon).
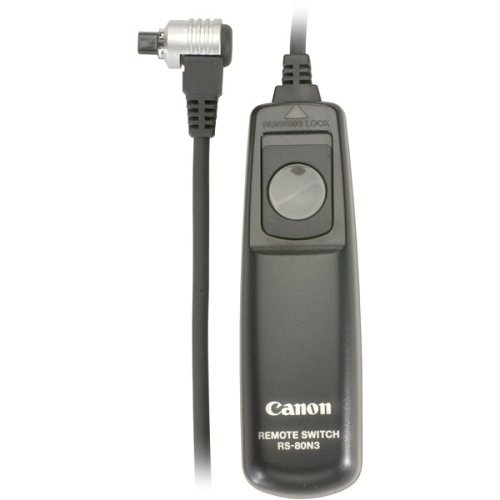
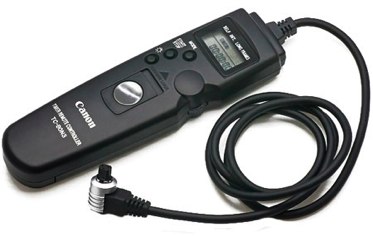
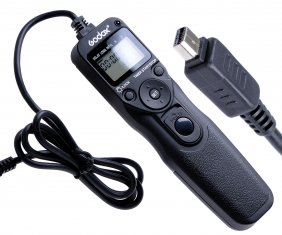
Intervolameter or Cable Release - You need cable release in order to shoot in BULB mode, exposure exceeding 30s. This is rather cheap. Most modern DSLR has a built in time indication when shooting in BULB mode, so, shutter release cable is adequate for your adventure. Intervolameter is like a cable release with digital display and timer. It allows you to set your exposure and interval. Original device from Canon,Nikon, etc, are normally expensive so you might want to consider a third party device that works just fine. Try GODOX, this costs lens than RM100.
Filters -
1- Neutral Density : My favorite NDs are Hoya ND400 and Lee Big Stopper. I can't remember when was the last time I use ND8, so, this and those lower stops ND are becoming redundant. Hoya ND400 allows me to exposure by 8 stops but this is a circular type filter. As for Lee Big Stopper, this is a rectangular 10 stops filter that fits to Lee Filter holder. This is more convenient for focusing purposes as compared to circular filter. When trying to fit the circular filter you may apply to much pressure on the focusing ring that the focus point shifted.
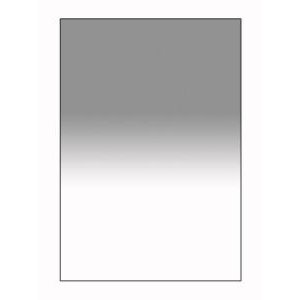
2- Gradual Neutral Density - I carry Lee GND set of 1,2 & 3 stops for 100mm size. For 80mm size, I carry Cokin GND8 and Hi-Tech Reverse GND8. GND allows you to avoid sky overexposure that can be used independently of with combination of other filters. Reverse GND is specifically for sunset.
3- Filter Holder - I use both Cokin and Lee filter holders. If you are using a full frame camera, get a wind angle filter holder to avoid vignetting.
4- Circular Polariser - Get a blue, high contrast sky or remove reflection. You need a CPL.
MUST HAVE:
Camera - Any DSLR camera. I am not specific into any brand or size of sensor but preferably of latest technology with low noise sensor. It is important that you camera is not too old that it suffers severe color noise from long exposure. This doesn't mean that your old cameras will not work. They work. As mentioned earlier....."preferably".....
Lens - Long exposure is normally associated with wide angle view. Thus, wide angle lenses are more useful than those long lenses. Places where you shoot long exposures are not conveniently next to your car or your house that you have the luxury to carry heavy lenses. My preferred lenses would be 24mm, 17-40mm, 24-70mm.
Tripod - This is probably the most critical none-electronic item you need for your adventure. The heavier the better (this contradicts with my statement of traveling light). Firstly, do not use that free gift tripod from the camera shop, aluminum, light weight tripod. It doesn't need strong wave to topple it, a strong wind would do....and it vibrates every time you release the shutter. I have many tripods for different purposes. For long exposure photography at the beach side or river or anything involving contact with water, I prefer stainless steel tripod leg. It is heavy yet steady. Otherwise I will carry carbon steel tripod or adjustable tripod legs (Velbon).
Intervolameter or Cable Release - You need cable release in order to shoot in BULB mode, exposure exceeding 30s. This is rather cheap. Most modern DSLR has a built in time indication when shooting in BULB mode, so, shutter release cable is adequate for your adventure. Intervolameter is like a cable release with digital display and timer. It allows you to set your exposure and interval. Original device from Canon,Nikon, etc, are normally expensive so you might want to consider a third party device that works just fine. Try GODOX, this costs lens than RM100.
Filters -
1- Neutral Density : My favorite NDs are Hoya ND400 and Lee Big Stopper. I can't remember when was the last time I use ND8, so, this and those lower stops ND are becoming redundant. Hoya ND400 allows me to exposure by 8 stops but this is a circular type filter. As for Lee Big Stopper, this is a rectangular 10 stops filter that fits to Lee Filter holder. This is more convenient for focusing purposes as compared to circular filter. When trying to fit the circular filter you may apply to much pressure on the focusing ring that the focus point shifted.
2- Gradual Neutral Density - I carry Lee GND set of 1,2 & 3 stops for 100mm size. For 80mm size, I carry Cokin GND8 and Hi-Tech Reverse GND8. GND allows you to avoid sky overexposure that can be used independently of with combination of other filters. Reverse GND is specifically for sunset.
3- Filter Holder - I use both Cokin and Lee filter holders. If you are using a full frame camera, get a wind angle filter holder to avoid vignetting.
4- Circular Polariser - Get a blue, high contrast sky or remove reflection. You need a CPL.
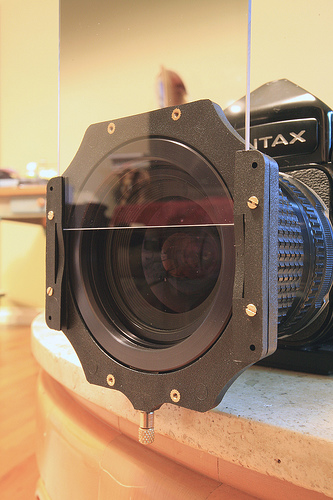
Lee Filter Holder and GND.
Location
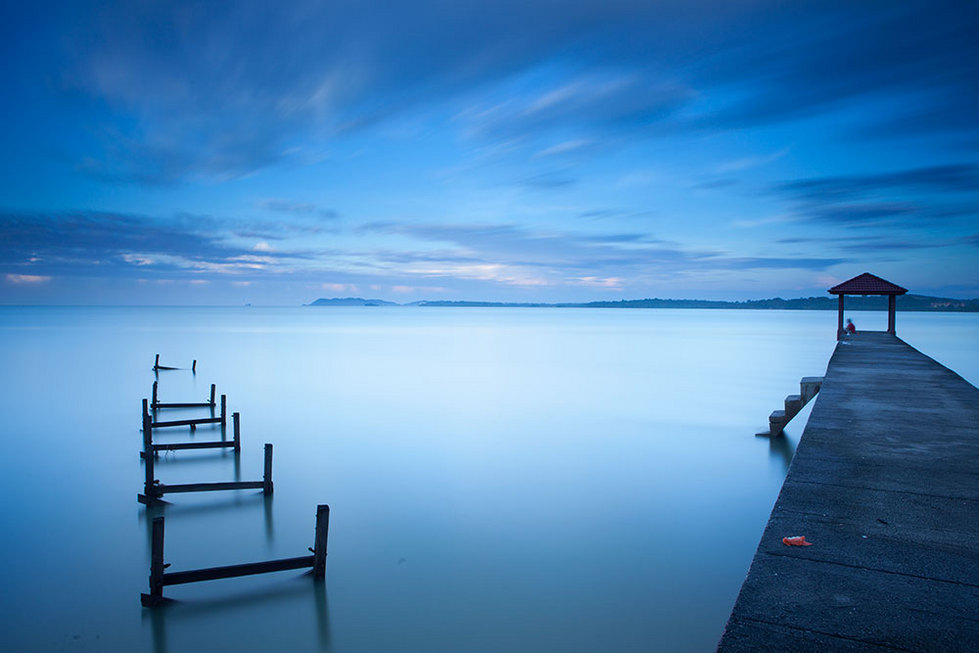
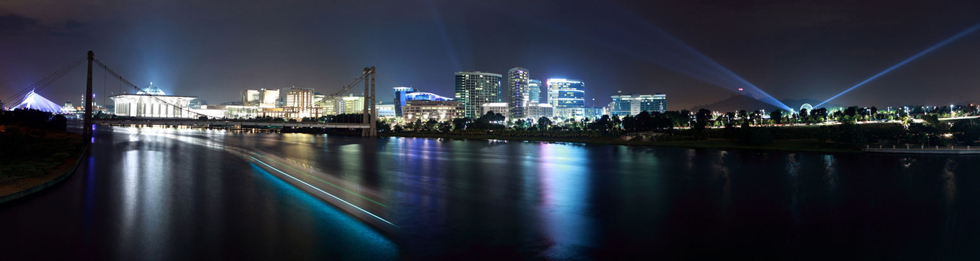
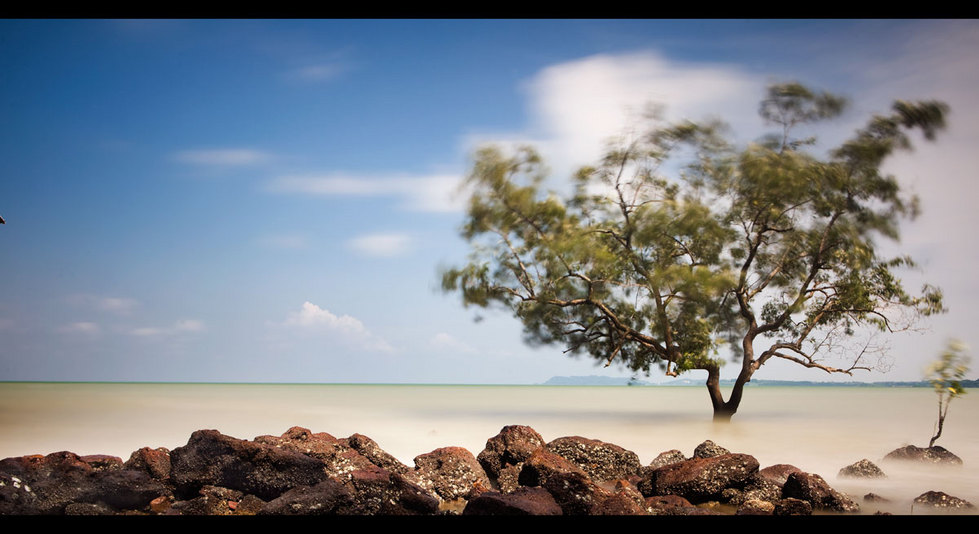
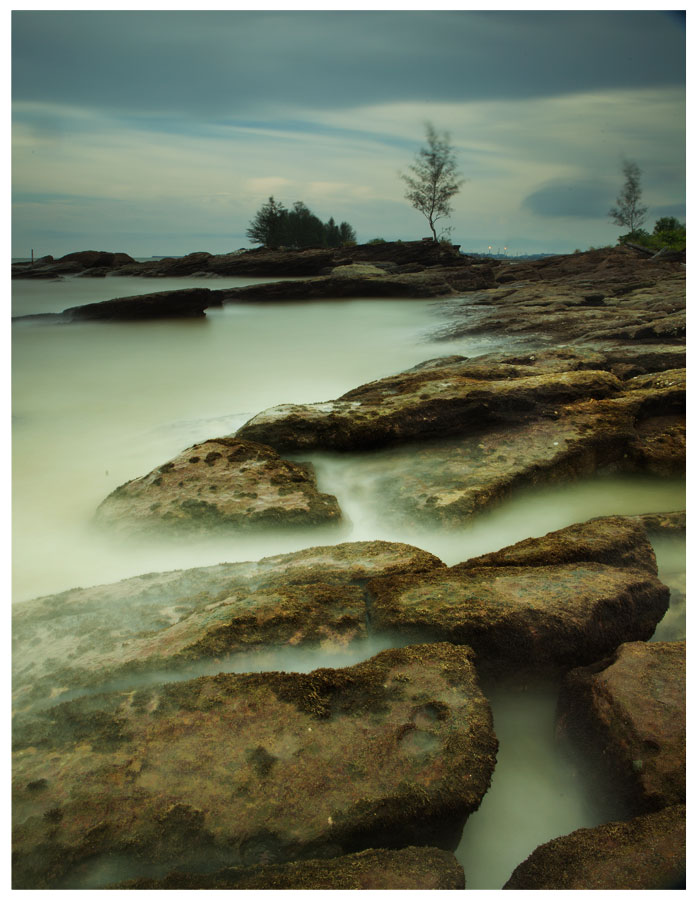
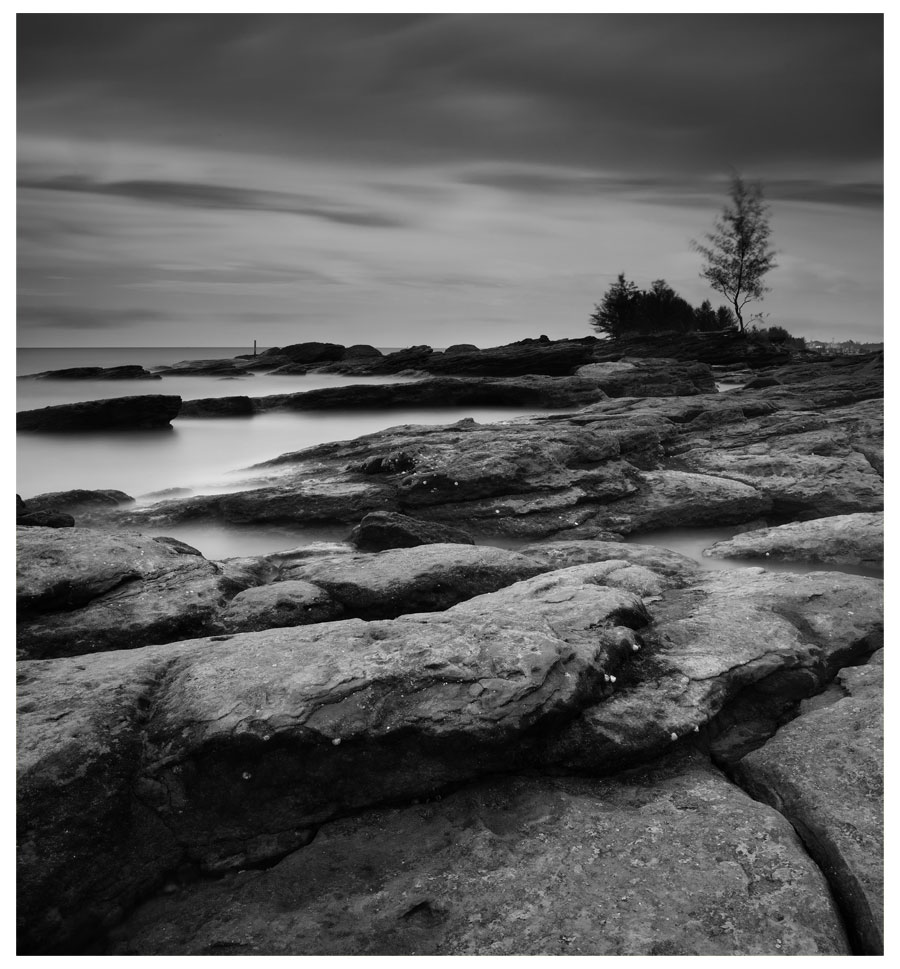
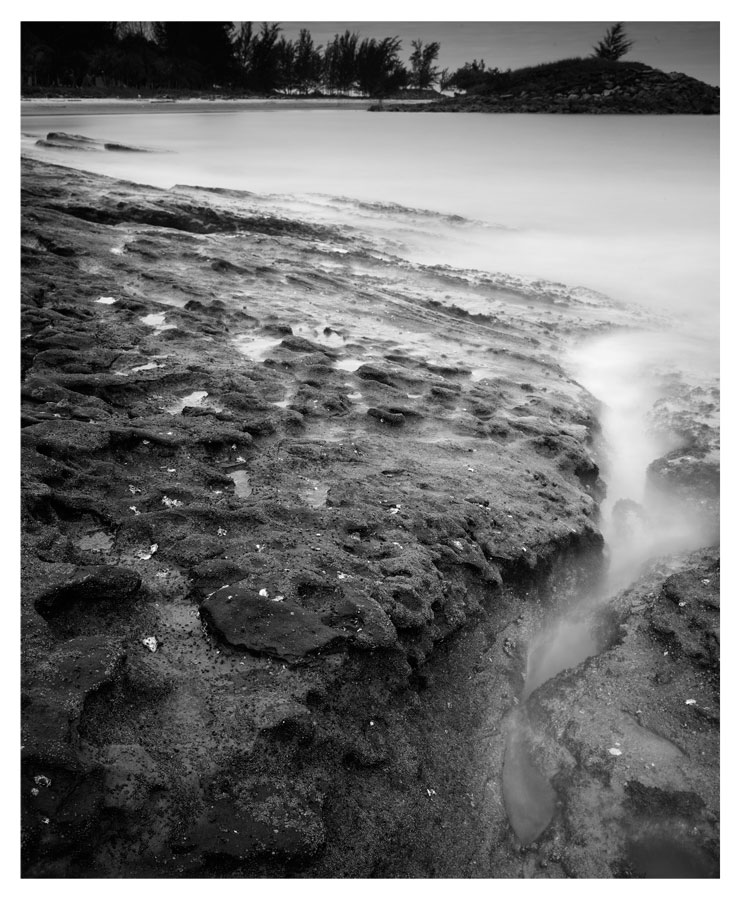
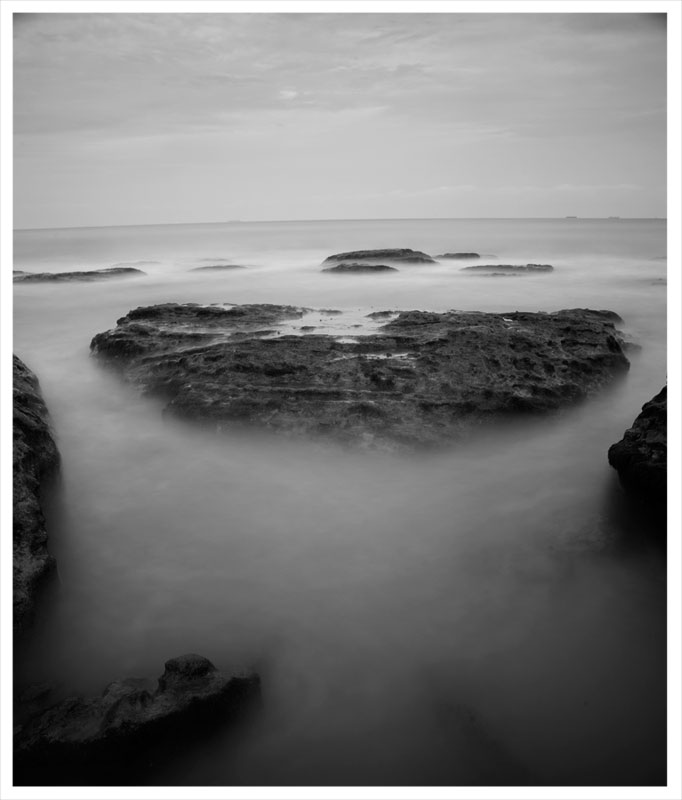
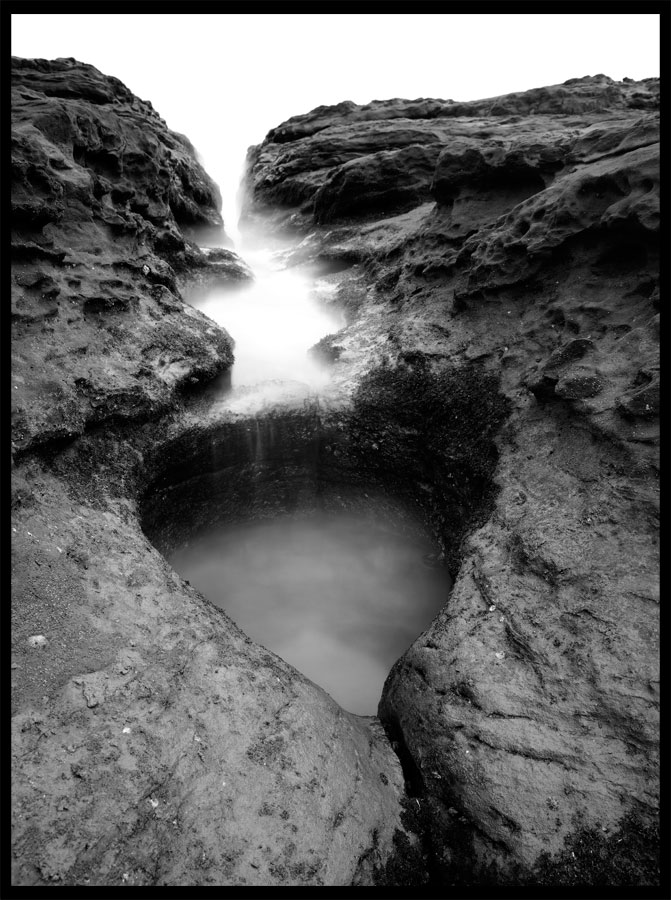
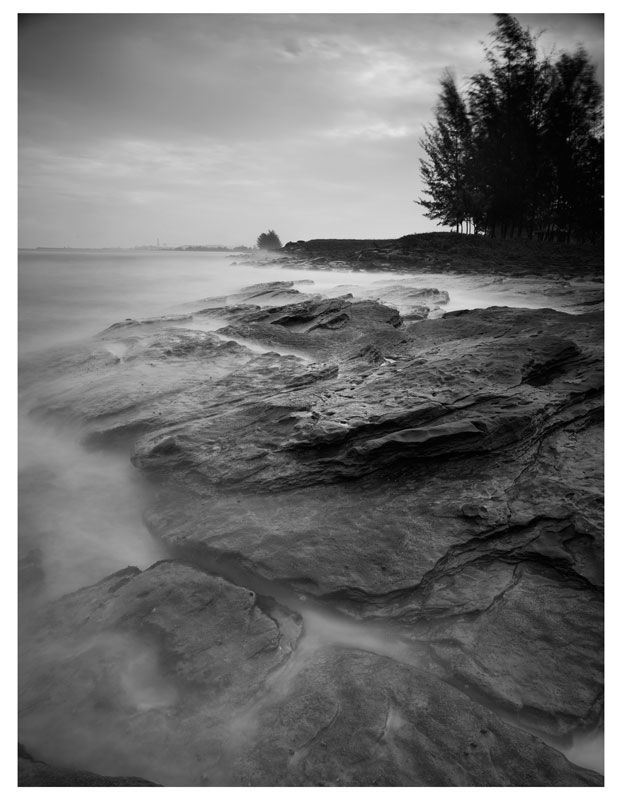
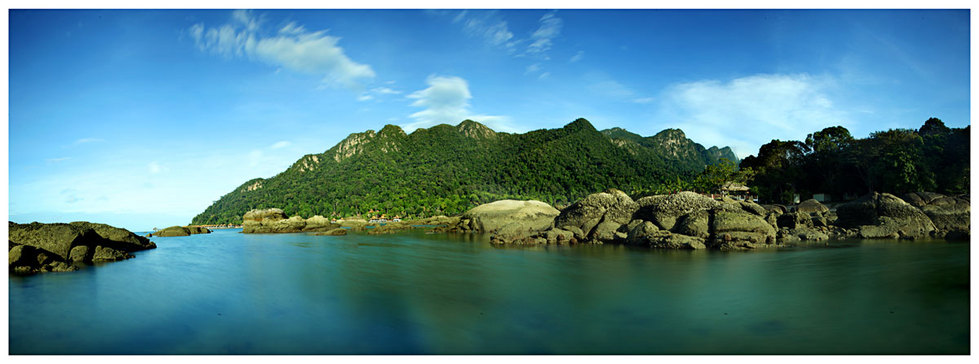
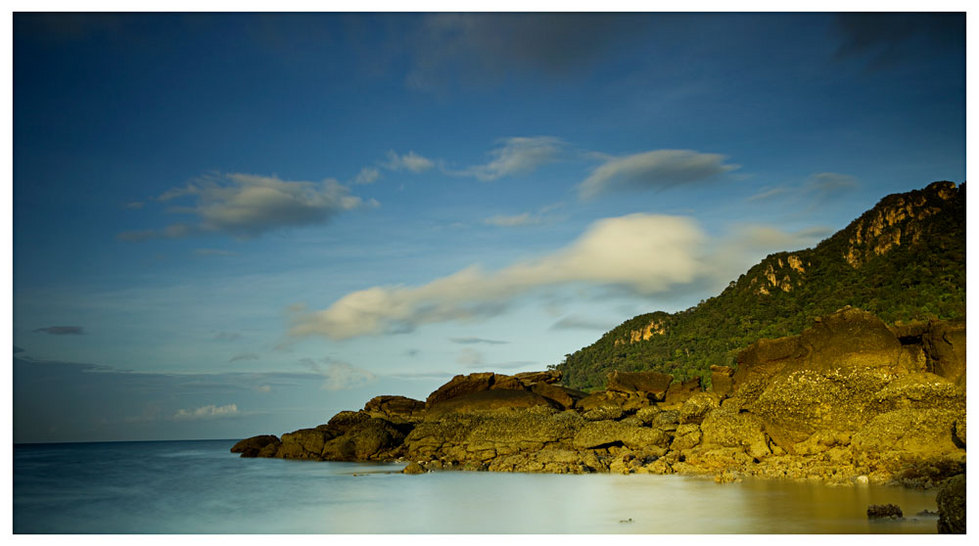
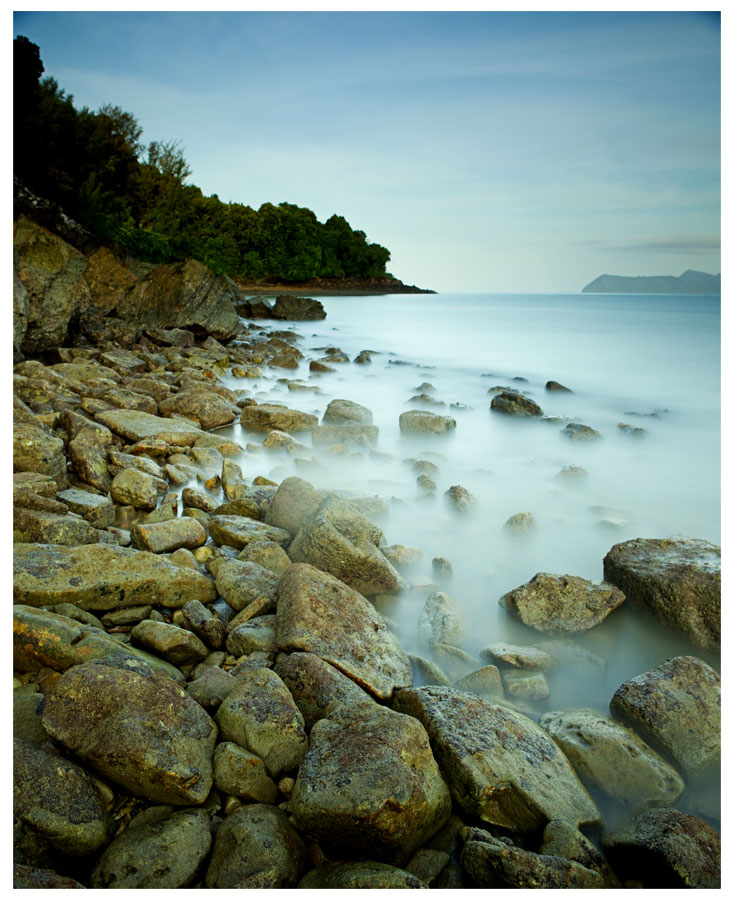
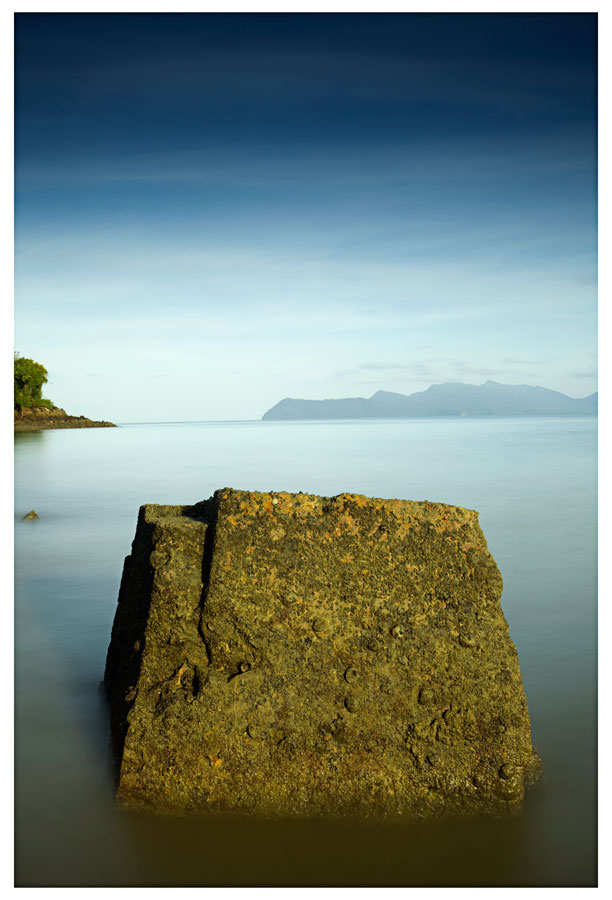
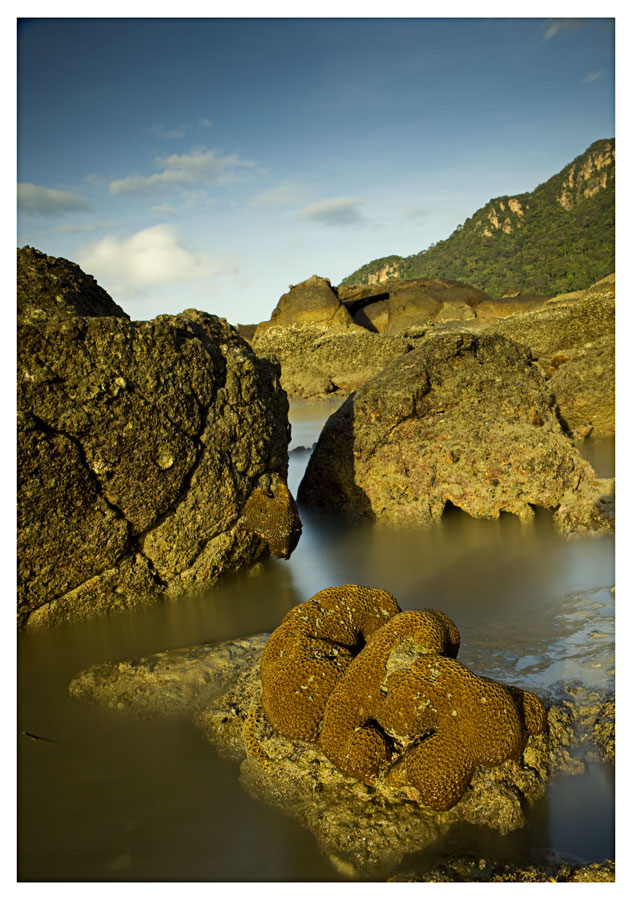
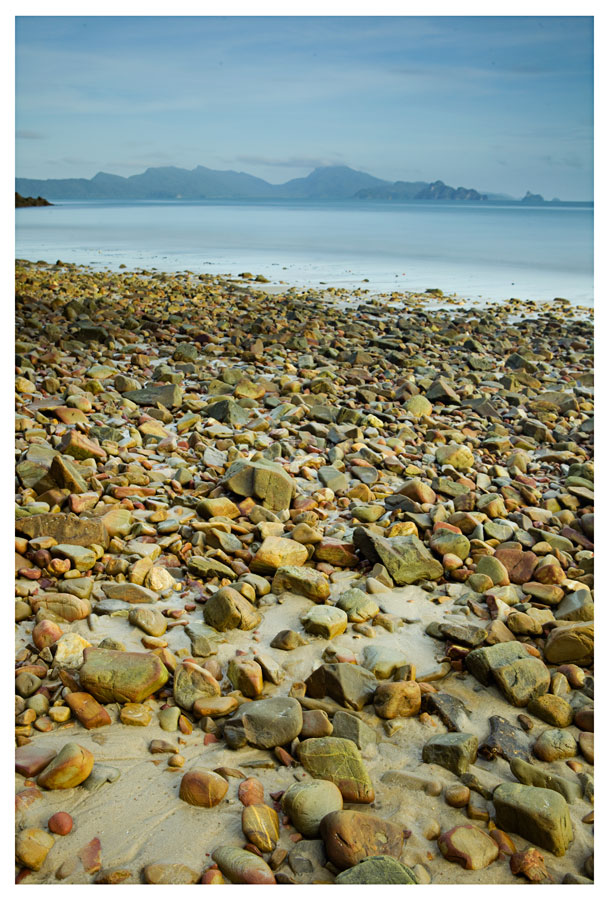
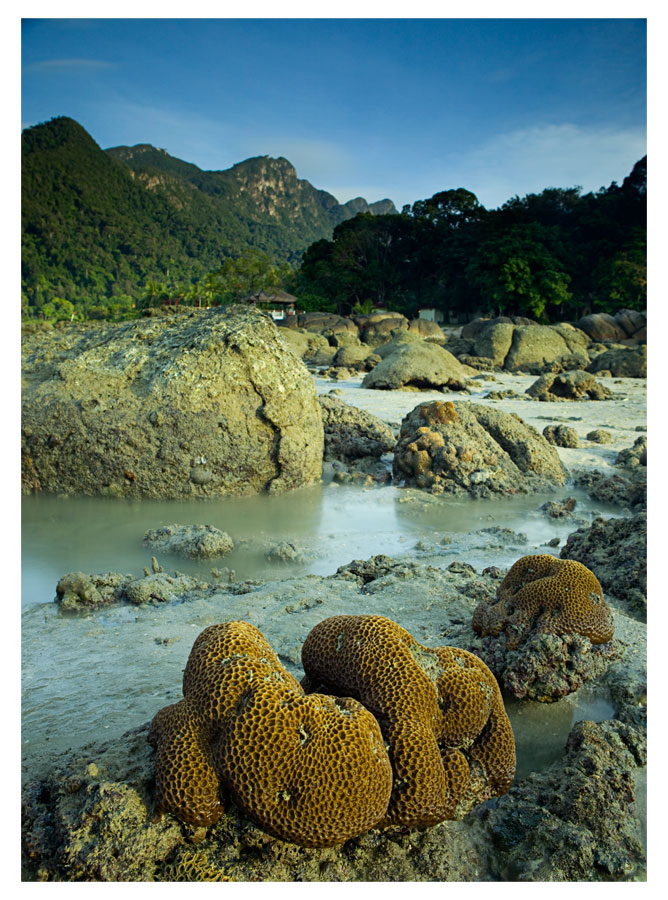
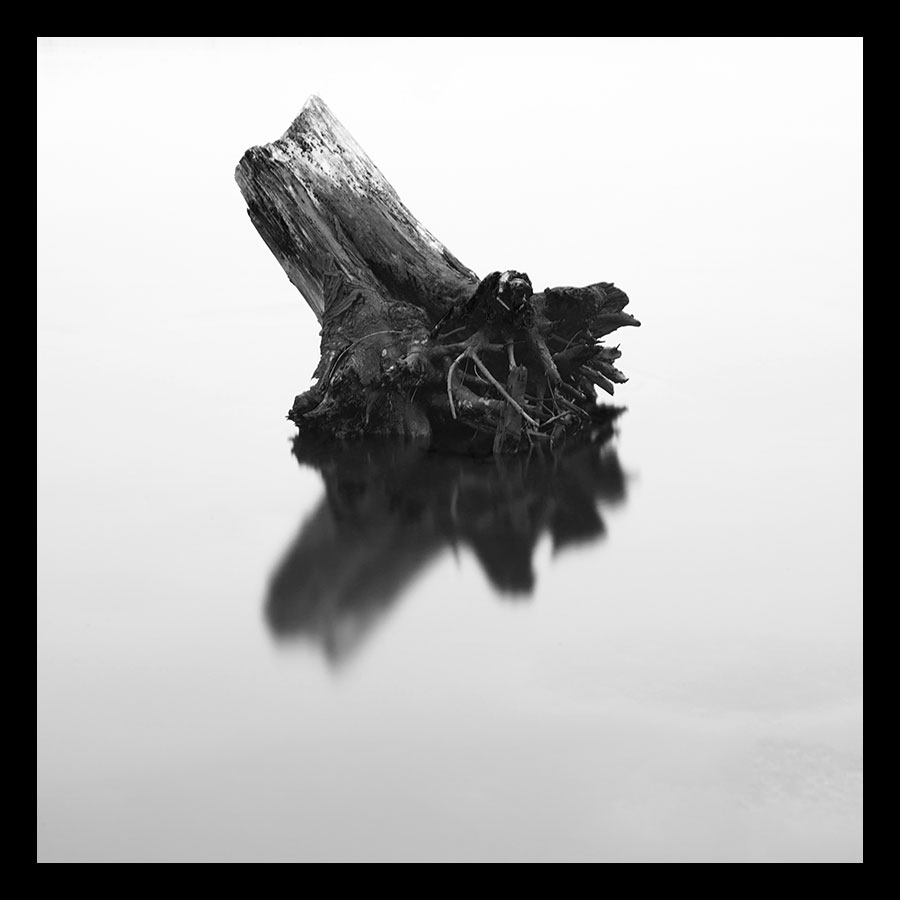
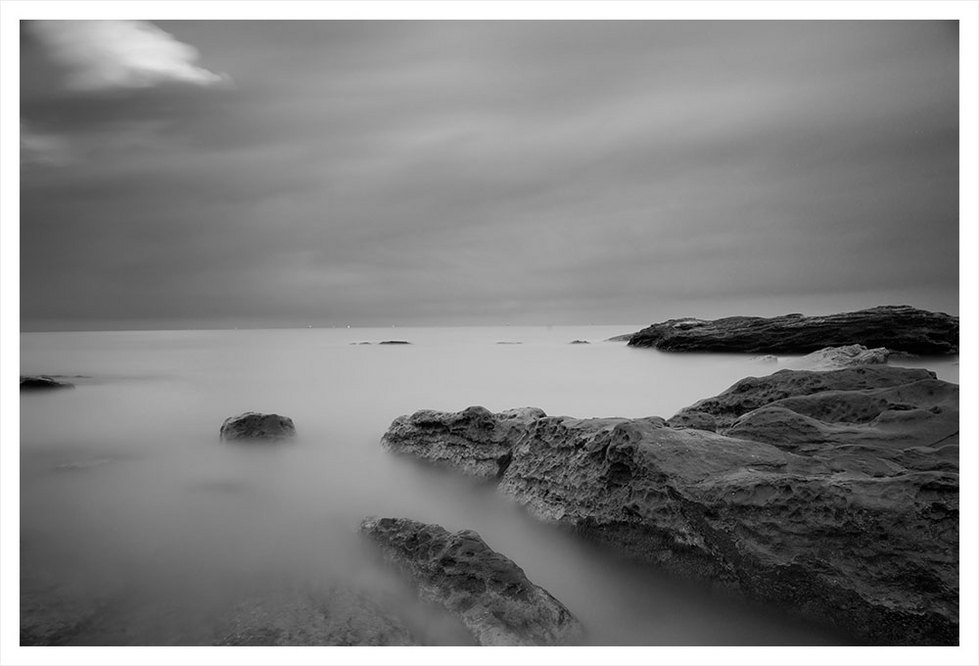
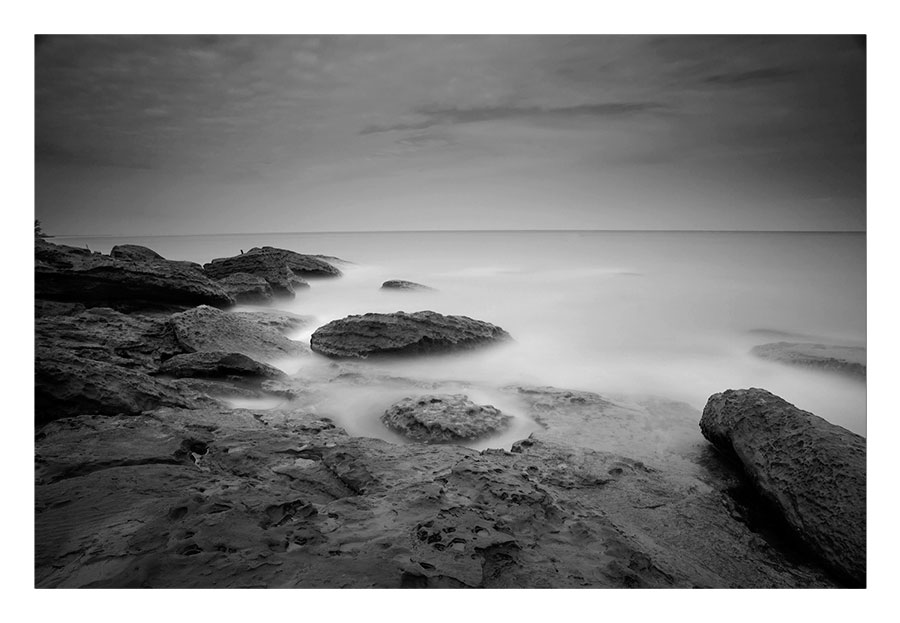
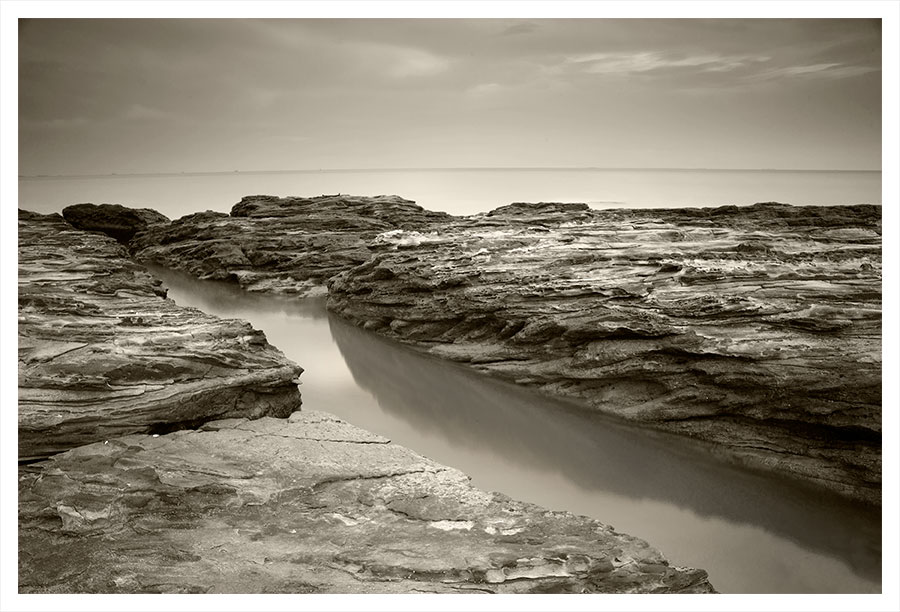
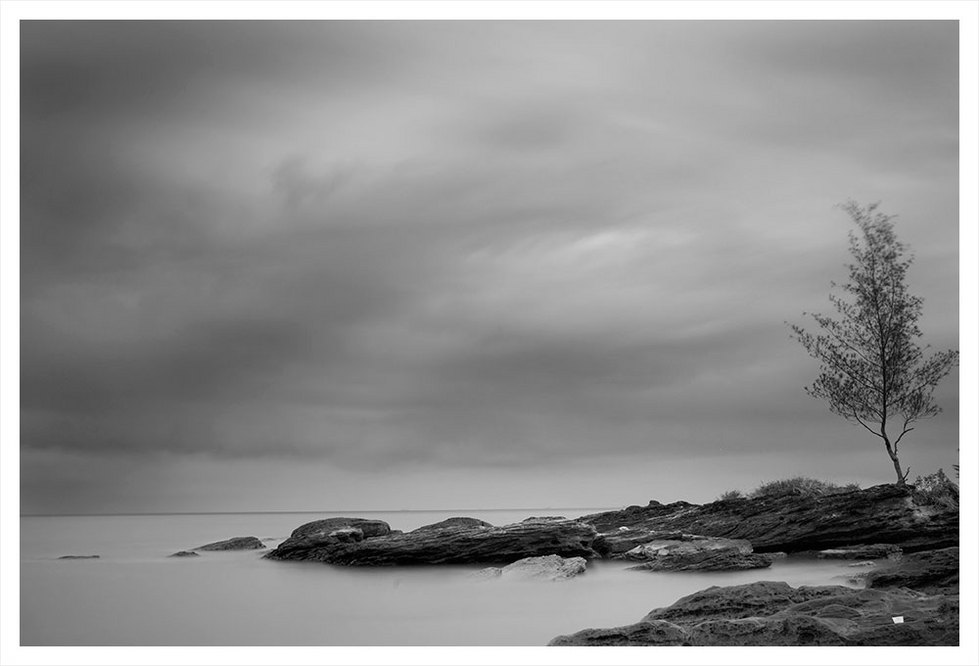
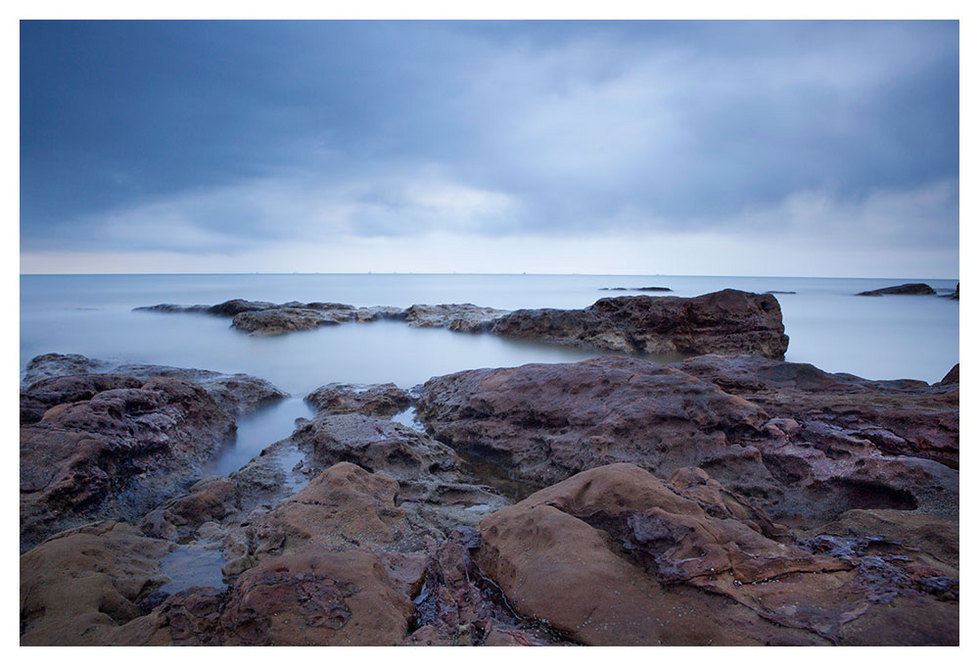
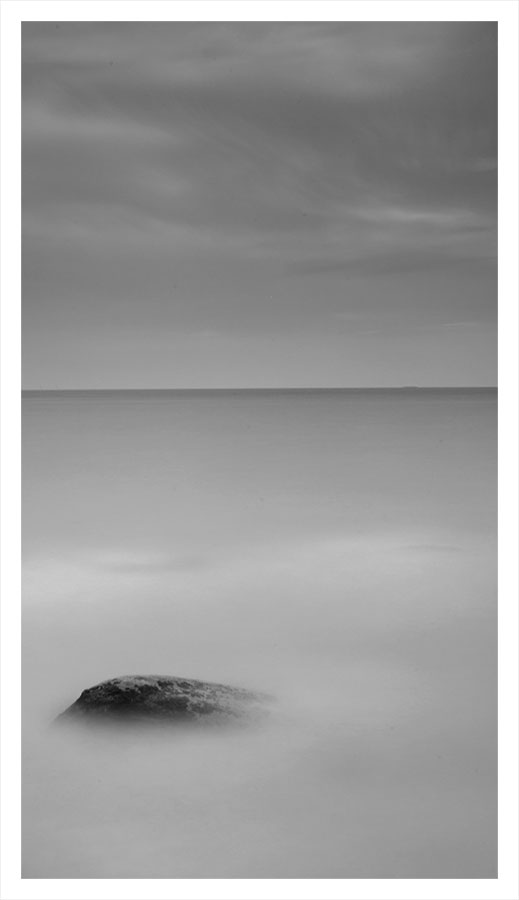
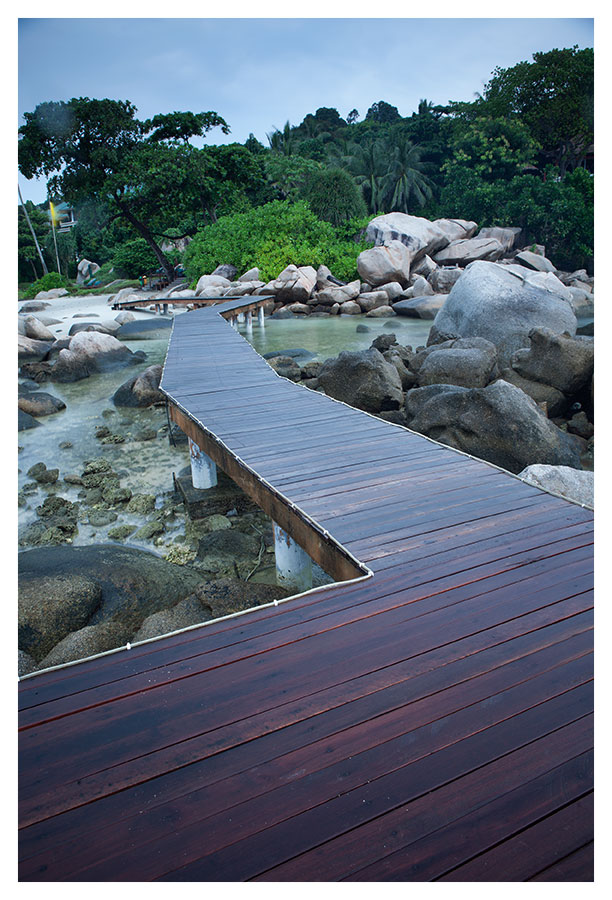
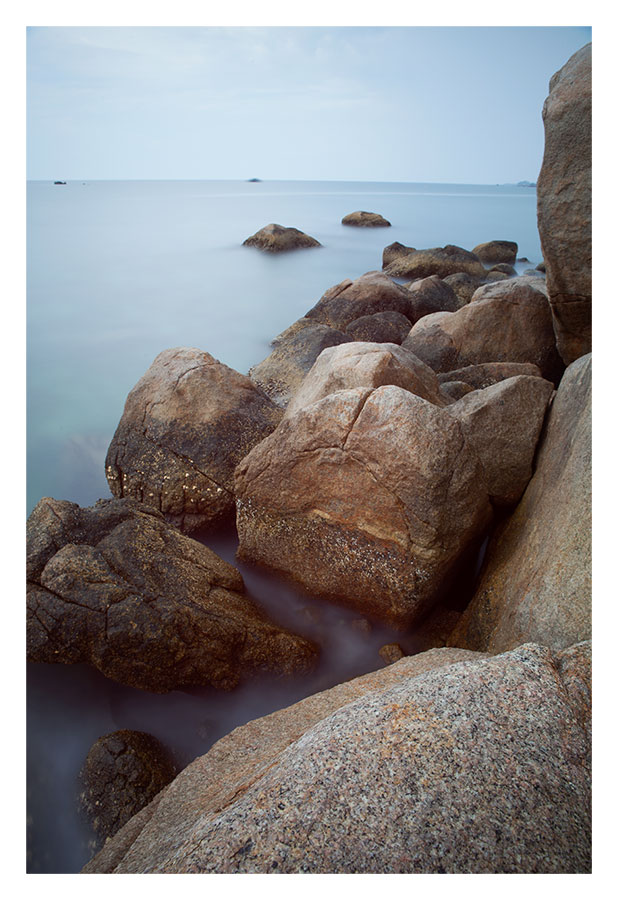
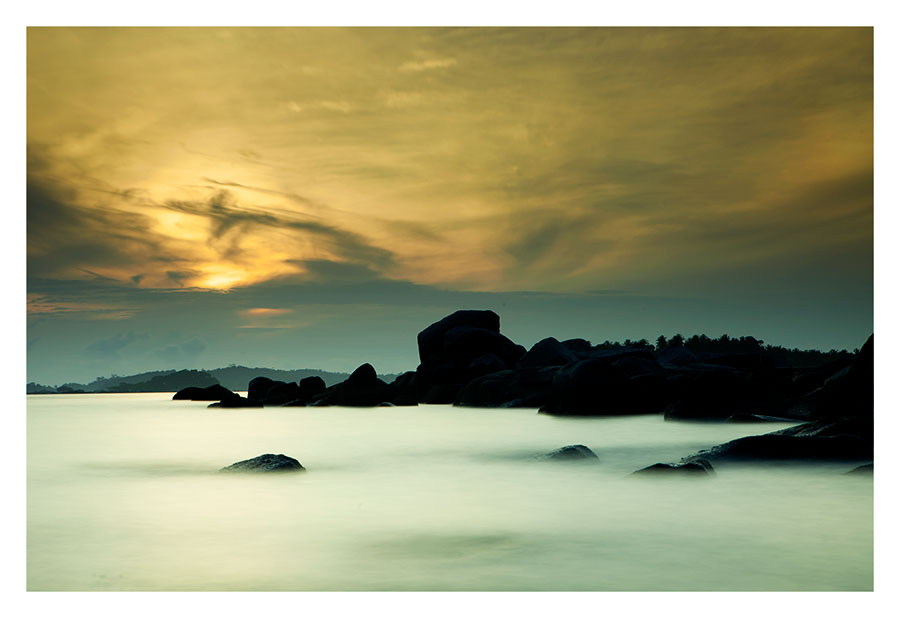
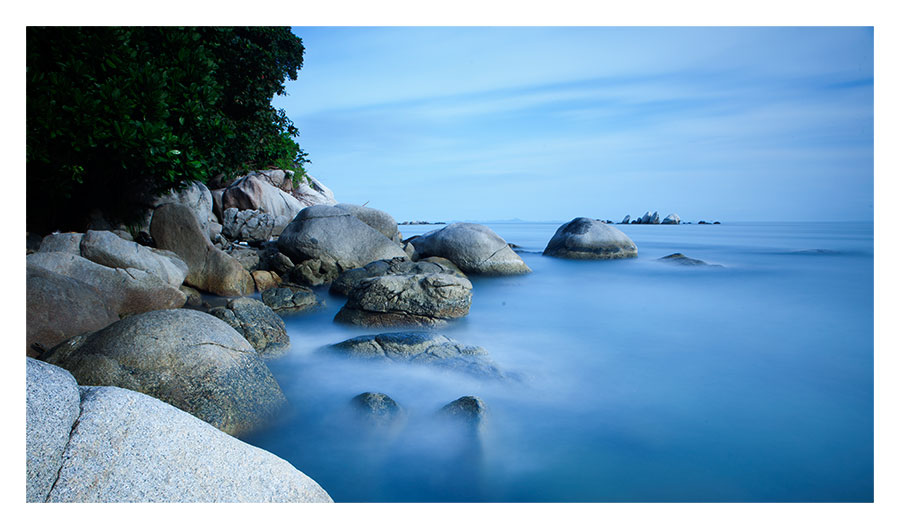
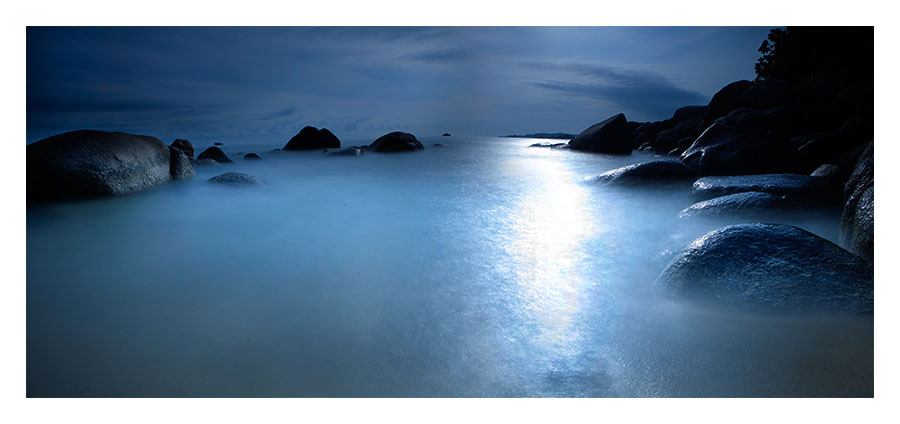
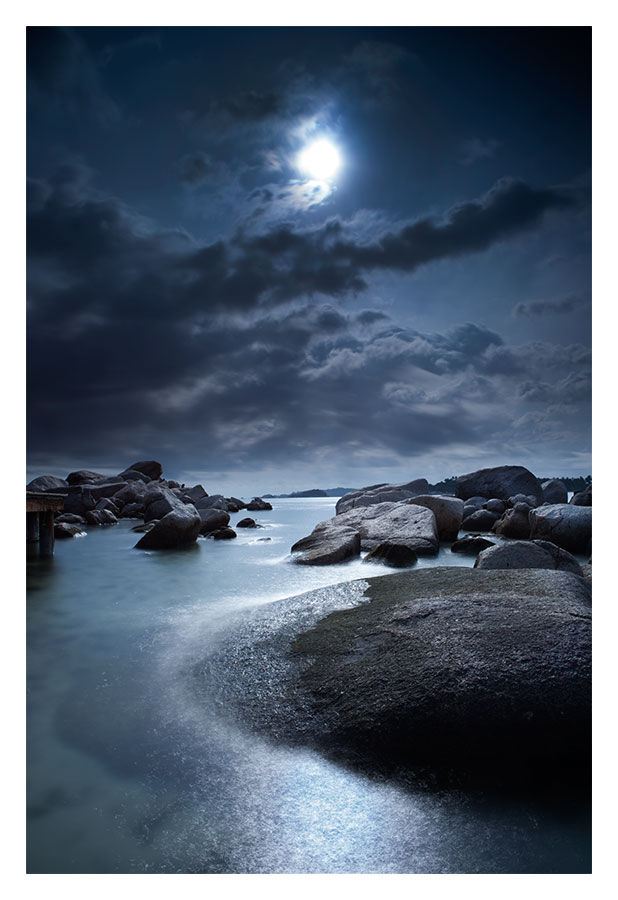
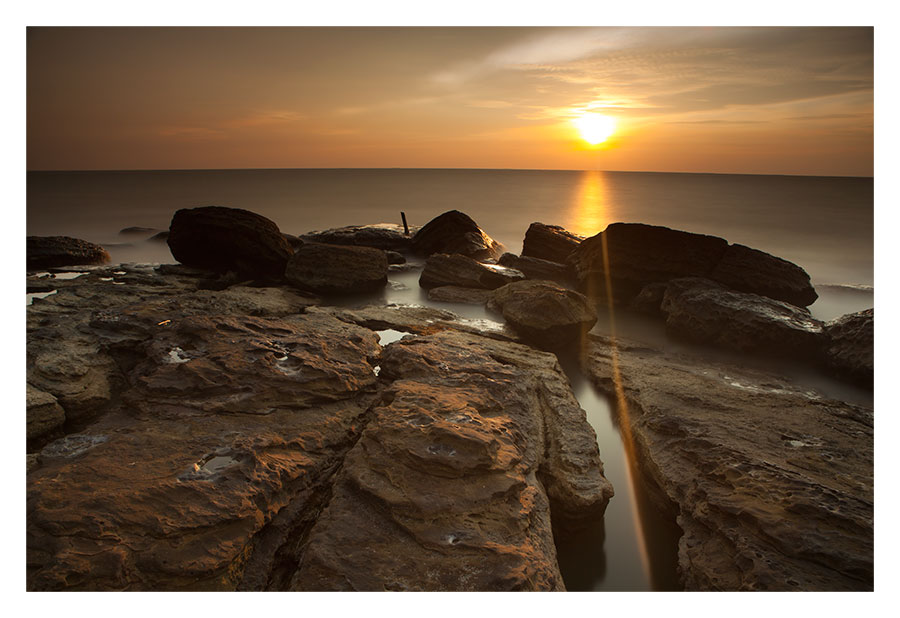
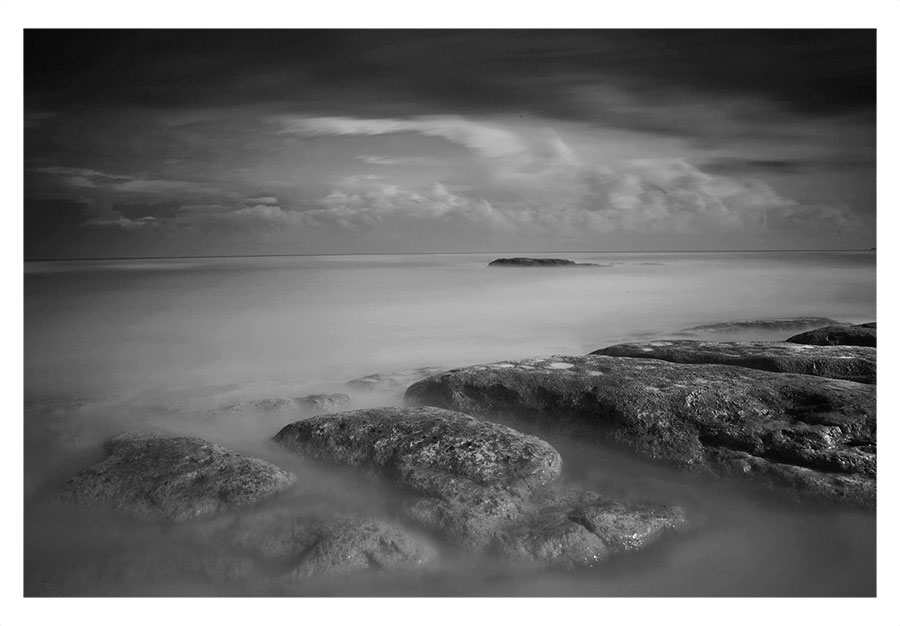
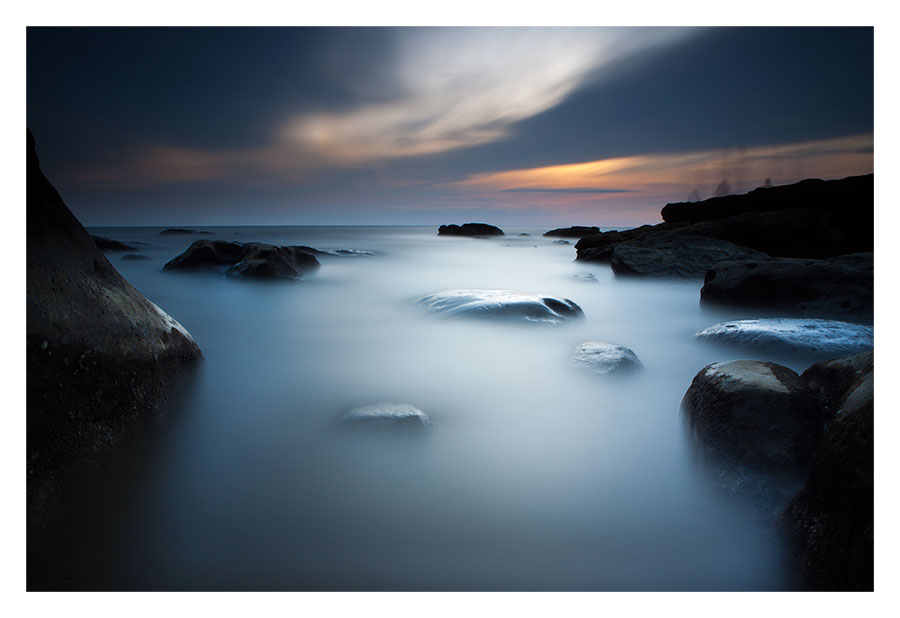
There are certain specific type of pictures that are best taken with long exposure technique, mostly Landscape or Nature photography. The concept of long exposure landscape photography is show the movement of elements in the picture that is none static for example clouds, water, grass, leafs, moving cars, etc, whilst static subjects remain razor sharp. Having said that, there is no restriction to use this technique for Landscape only. It can also be used for skyscrapers, highways, etc. My preference is on Landscape where there are elements of water and clouds where we have movements on both sides of the horizon.
Subjects
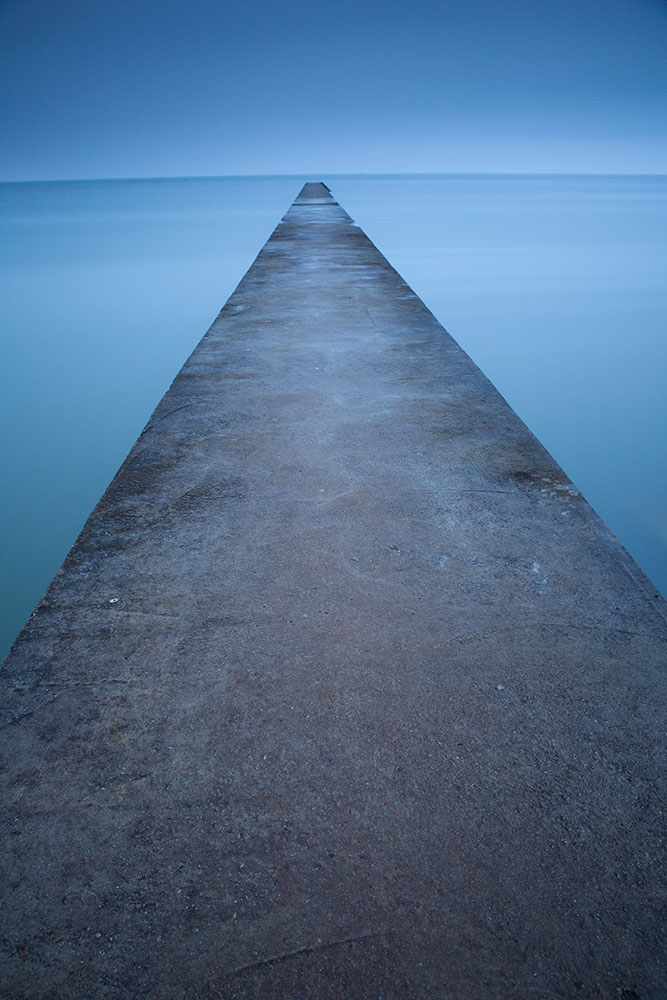
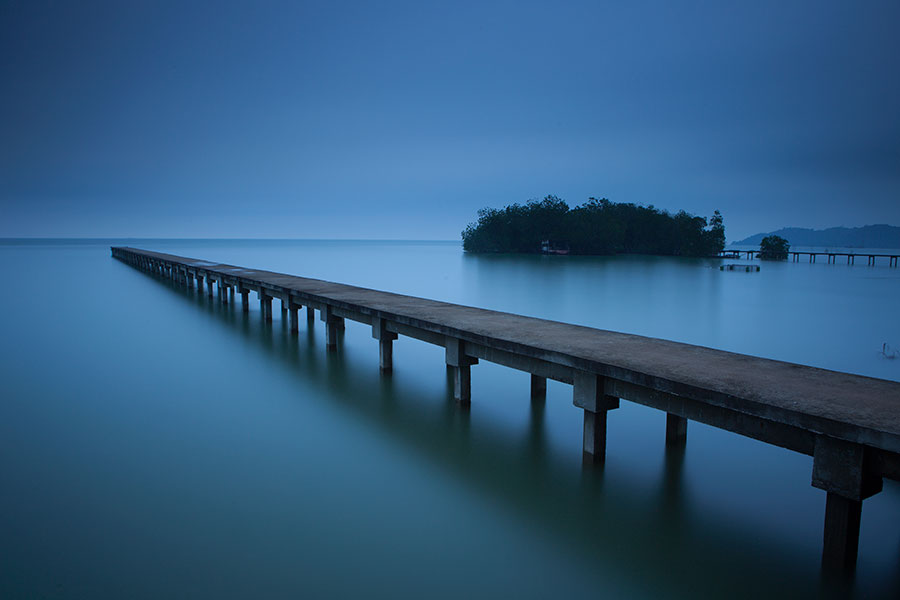
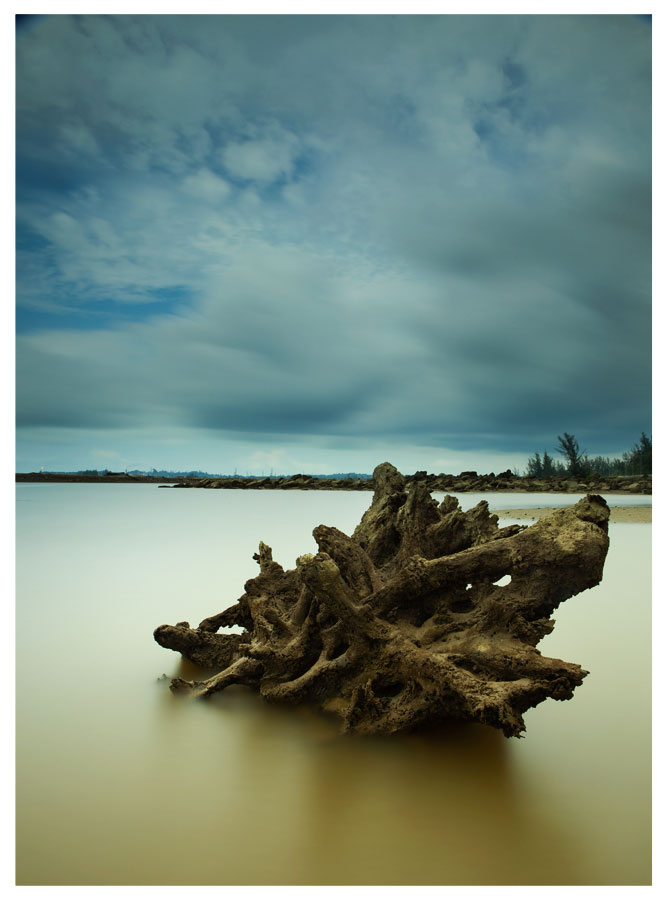
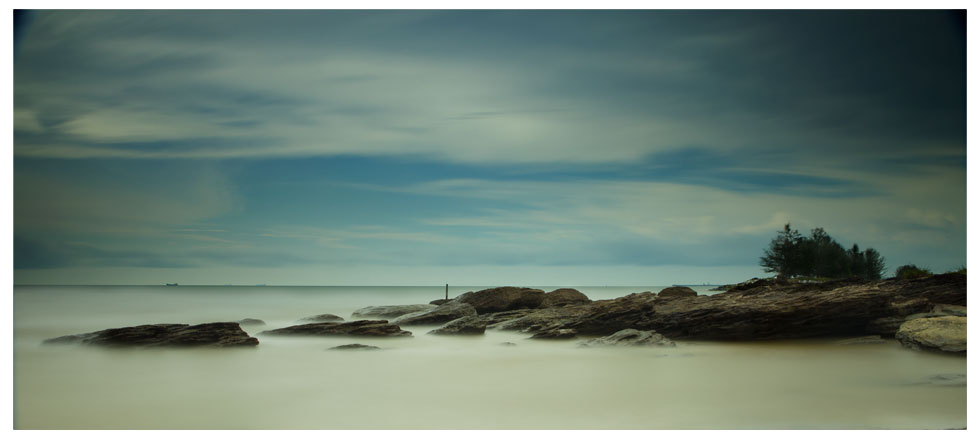
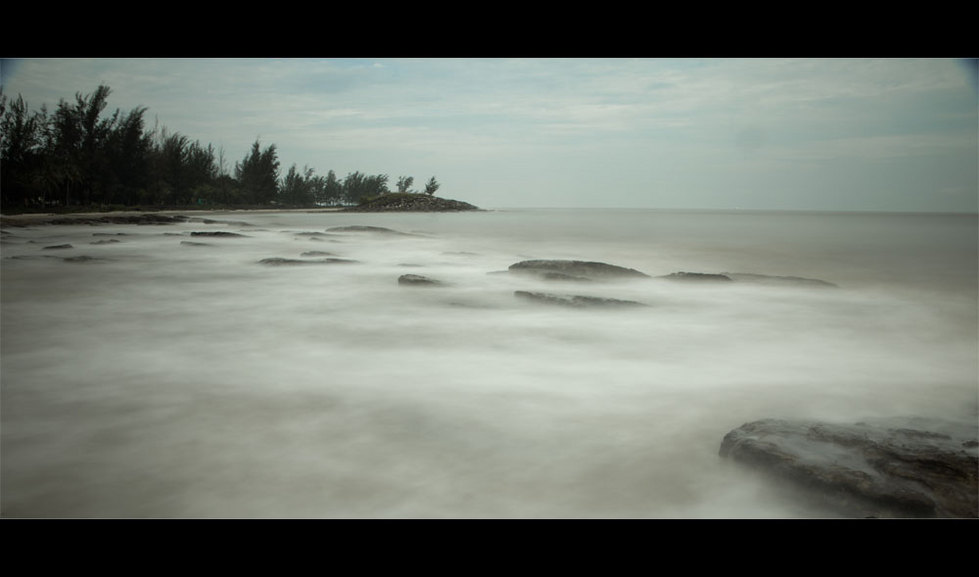
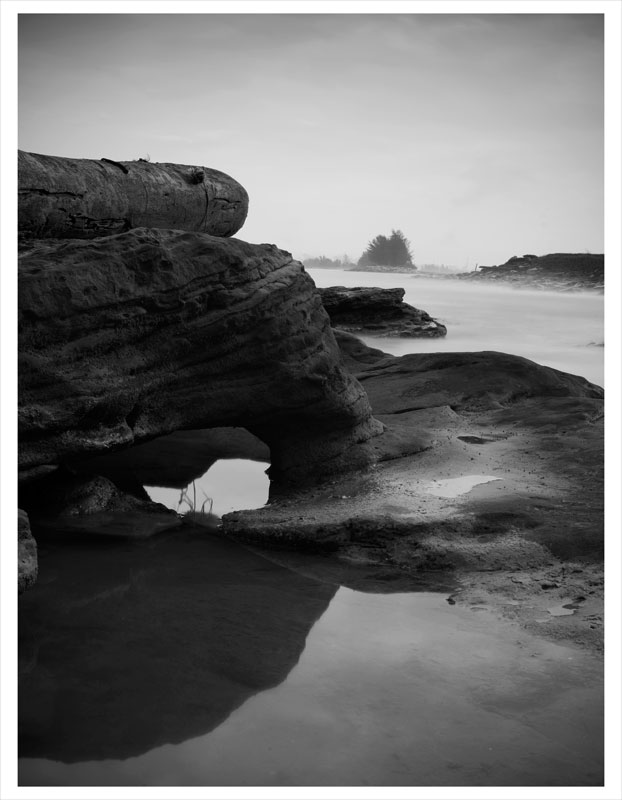
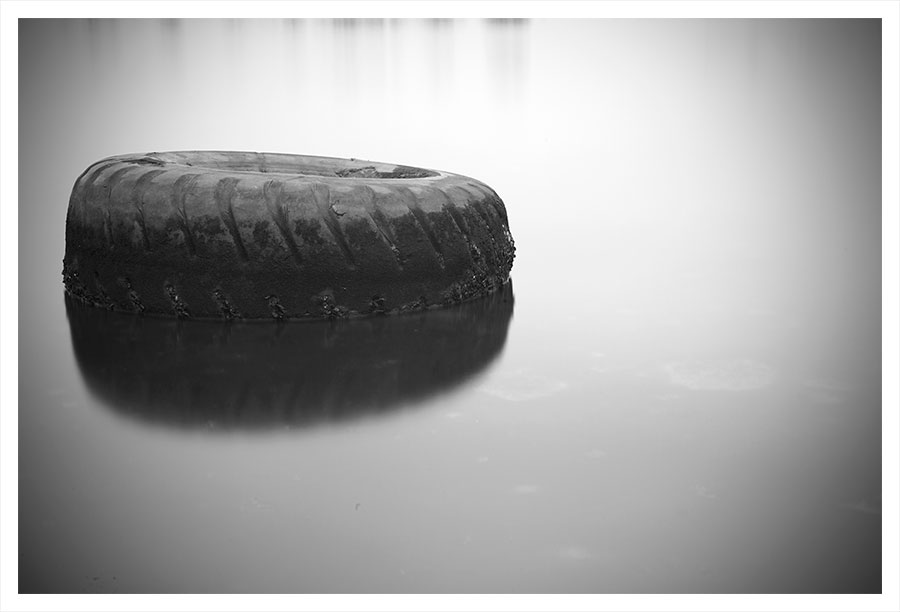
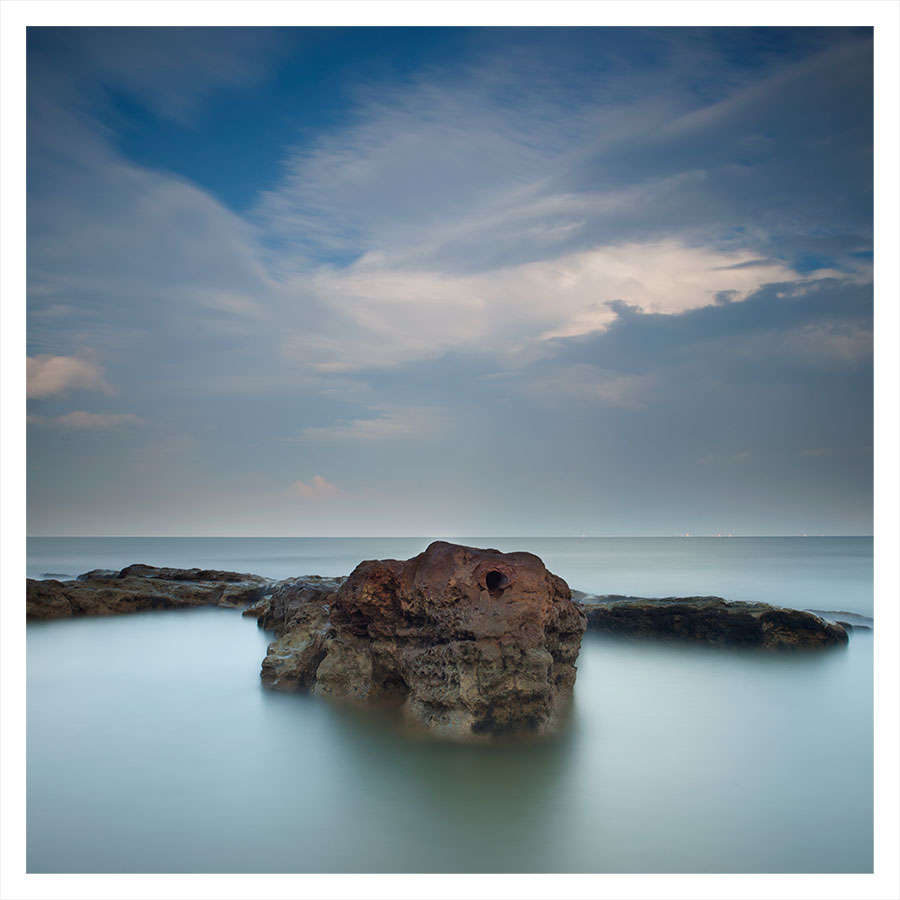
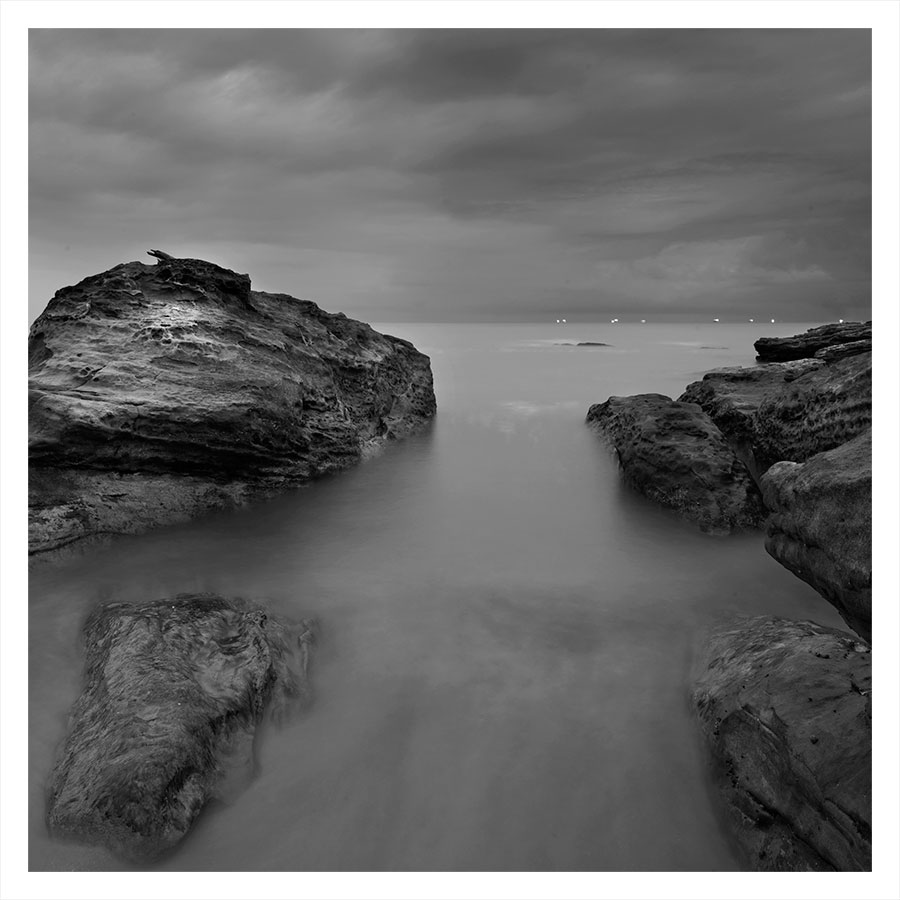
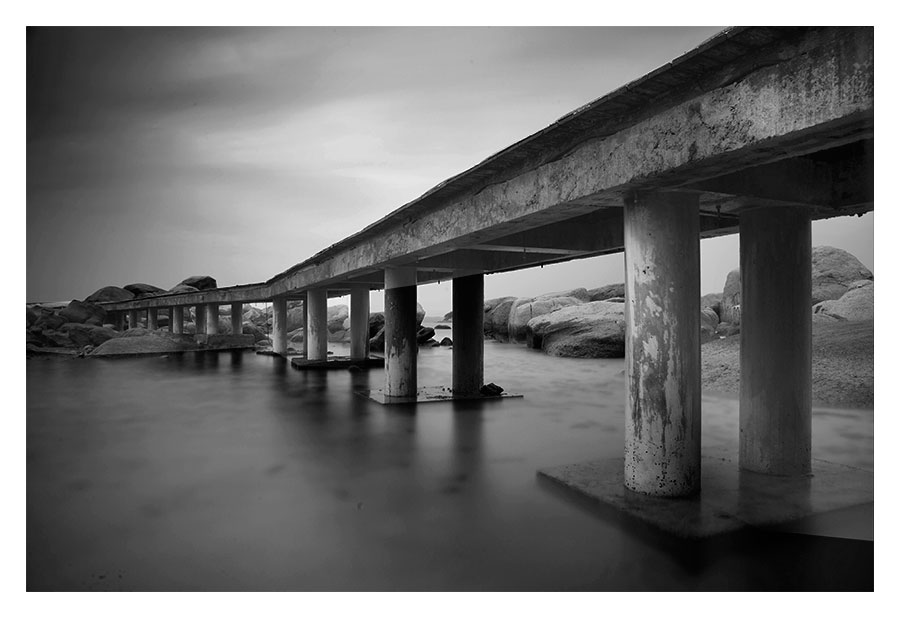
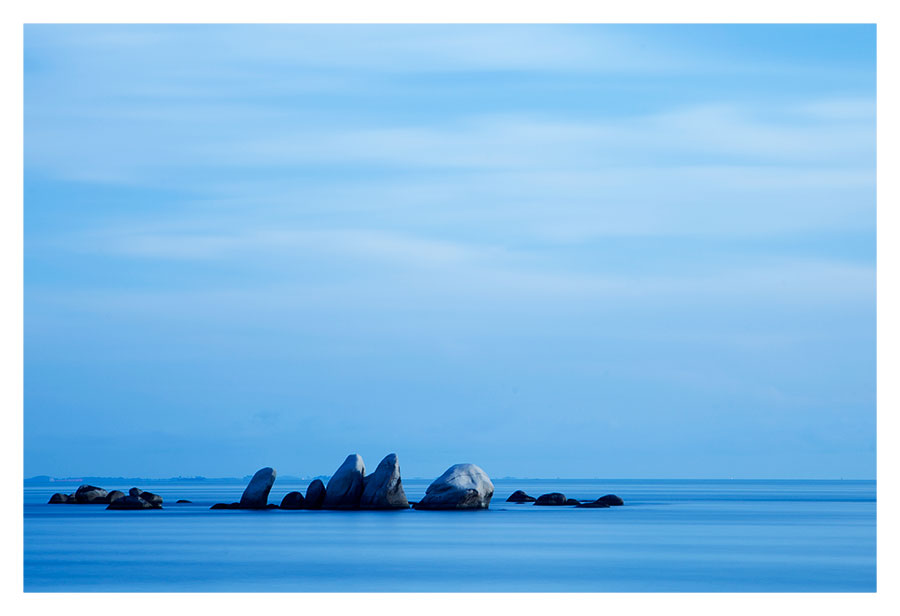
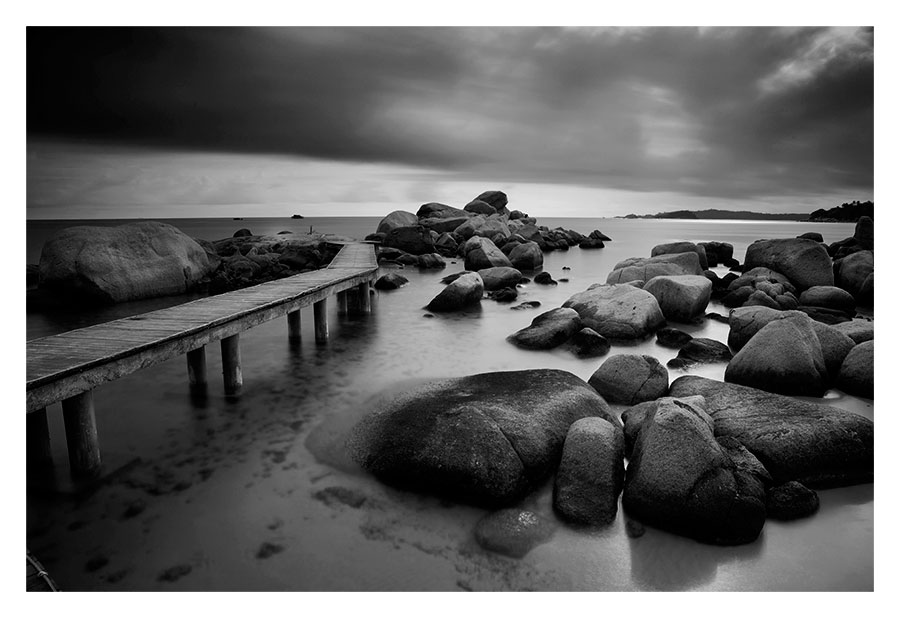
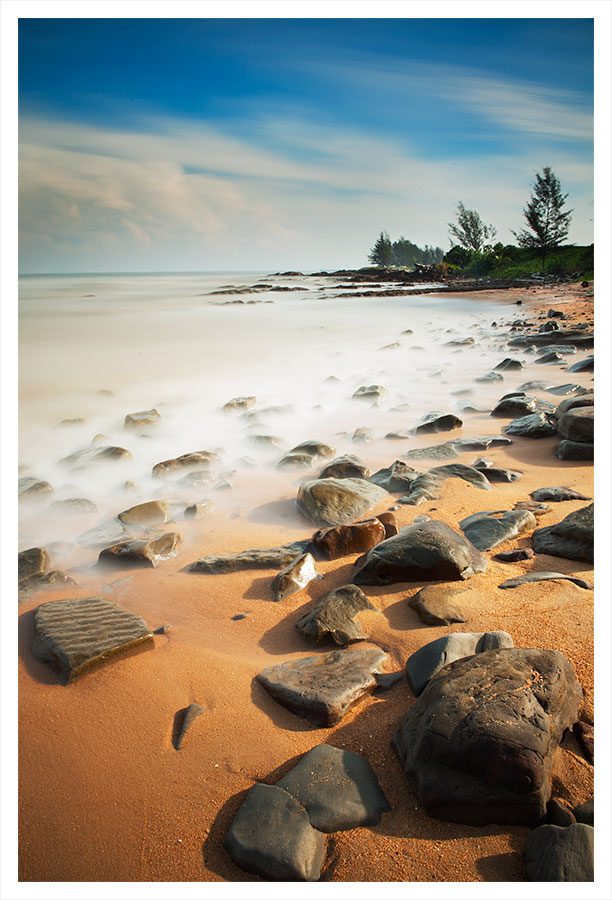
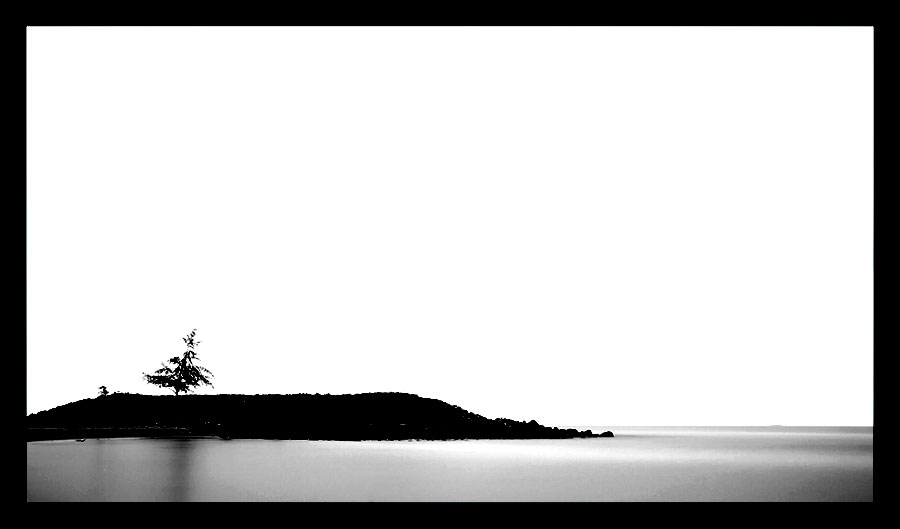
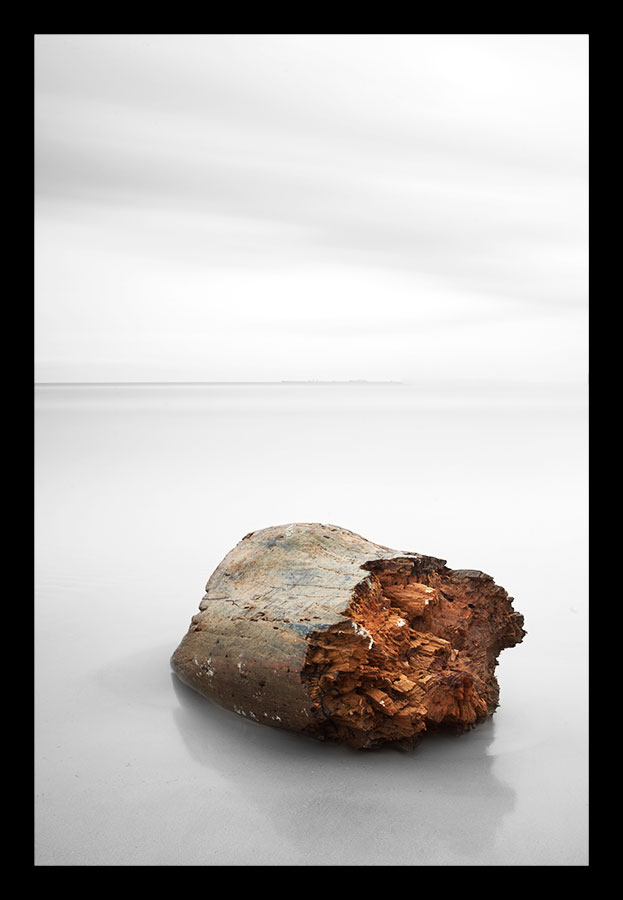
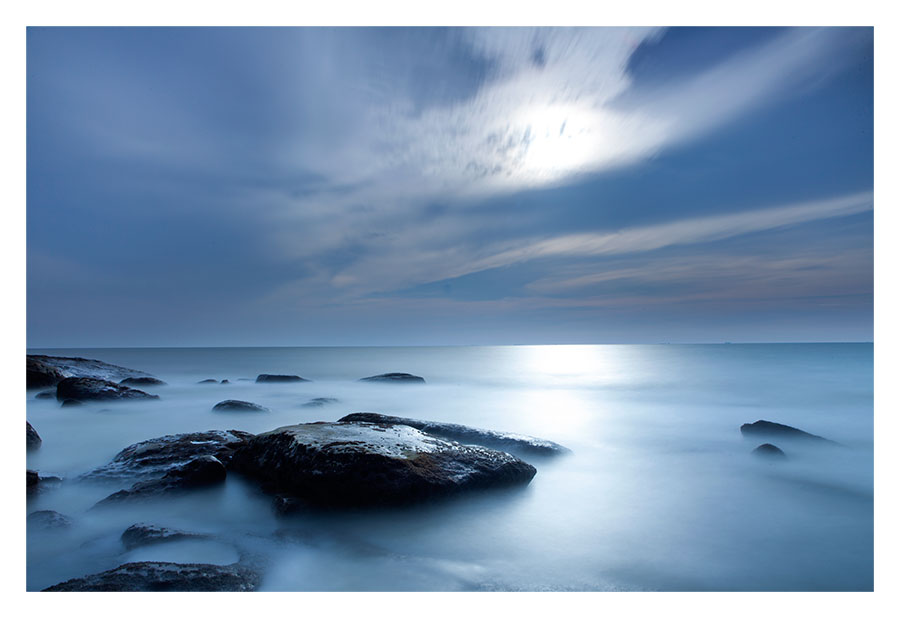
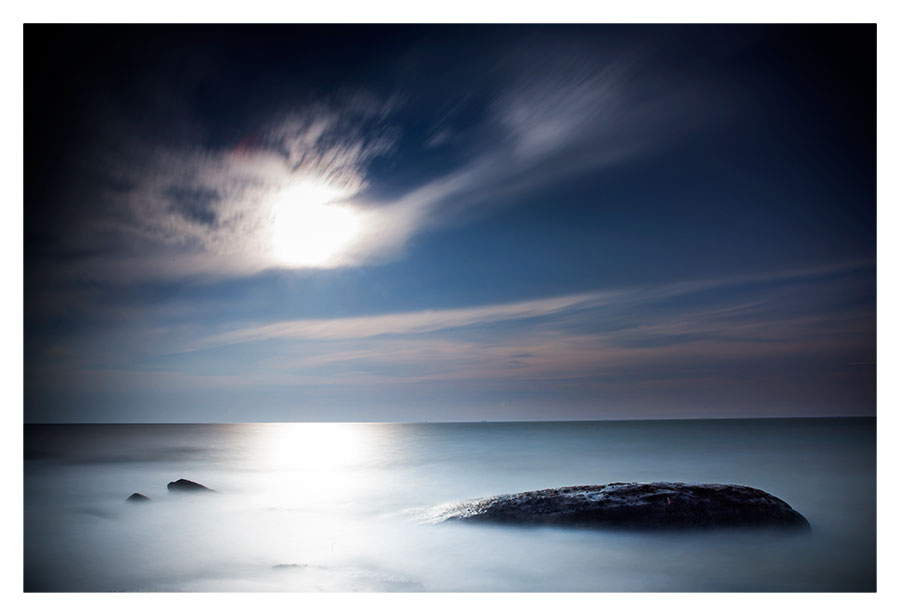
Look for static subjects within the two elements of water and clouds. Example : rocks, jetty structures, piers, poles, lighthouse, tree trunk, tires, trees, small island, etc.
Composition
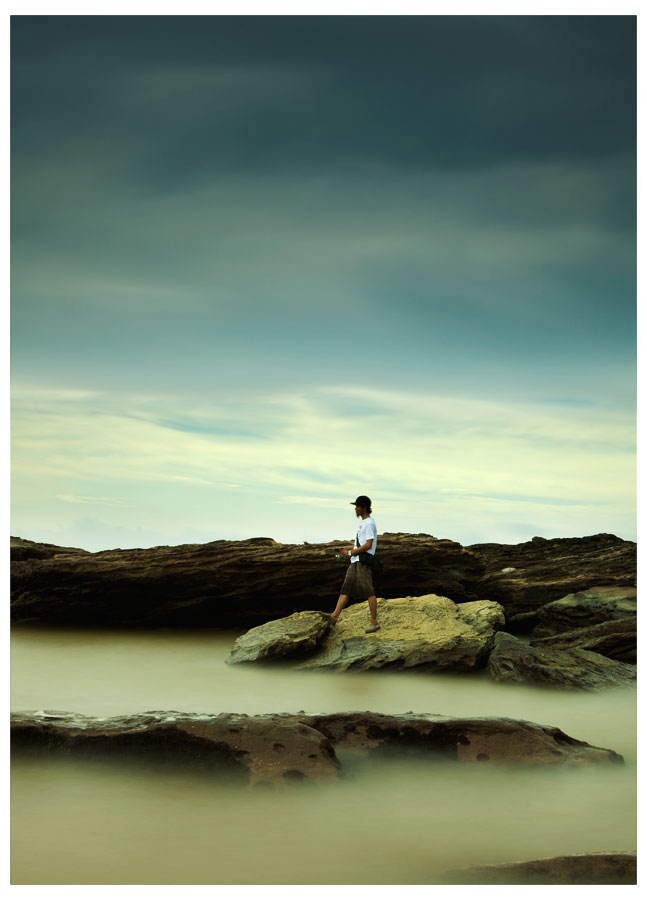
Probably the most important part of long exposure photography is composition. It makes the difference between good and amazing shot. For a simple single subject like single rock, tree trunk, pole, etc, I just use a simple rule of third composition on either vertical or horizontal orientation. Simple yet amazing.
Some rocks formation has a line element where I love to choose a line that extends towards the horizon rather than towards the land. Simply because we want the contrast between rocks and the sky/sea/sun. The rocks are like pointing or moving towards the horizon. If you are lucky enough, you may have sky movement towards the horizon, thus, the final result will be rocks and clouds moving towards the same direction i.e. the horizon.
Again, keep it simple with rule of third on the horizon line. Try both vertical and horizontal. You may discover that the other orientation is much better. No harm of taking an extra shot!!!
Timing
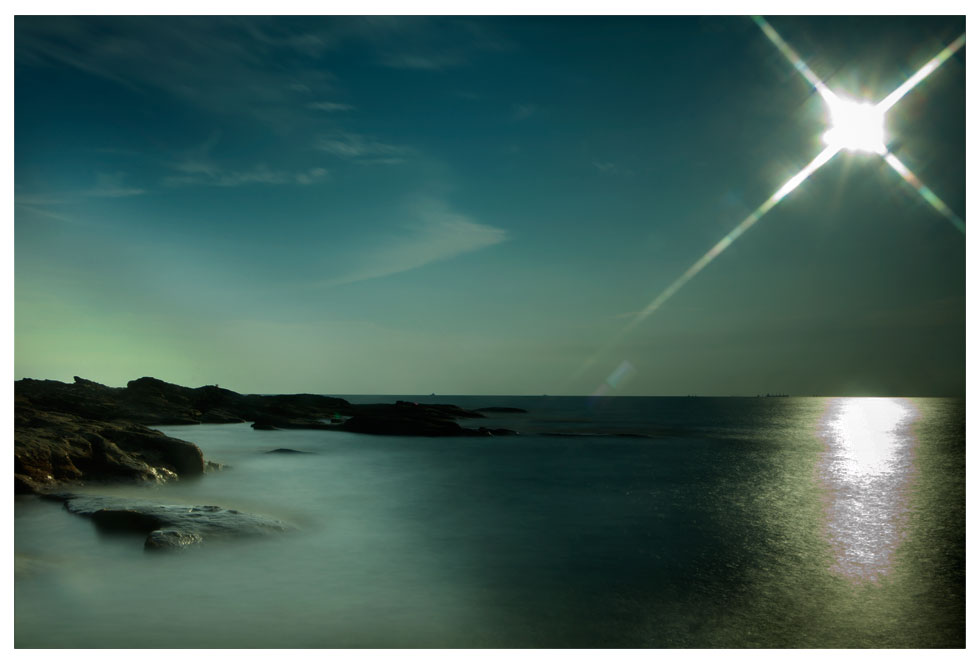
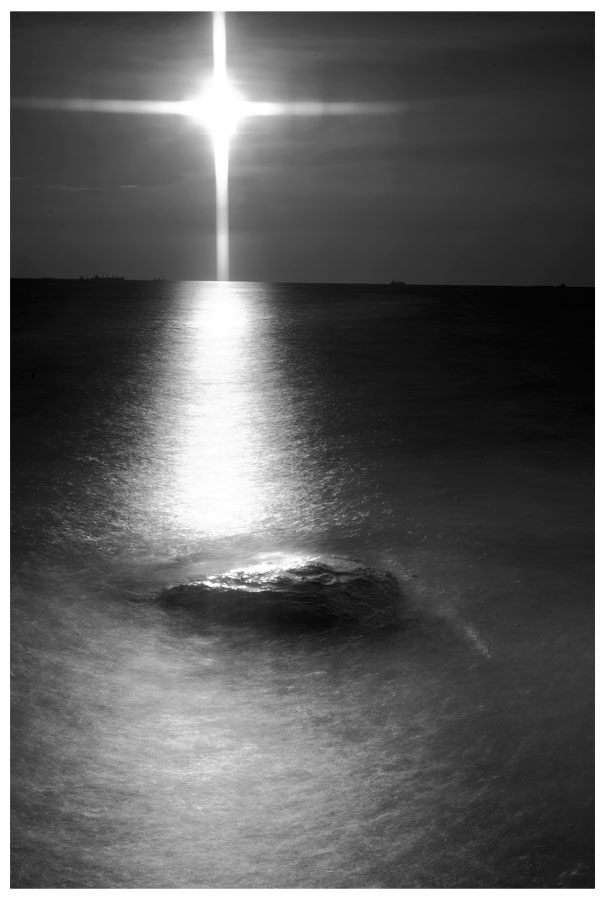
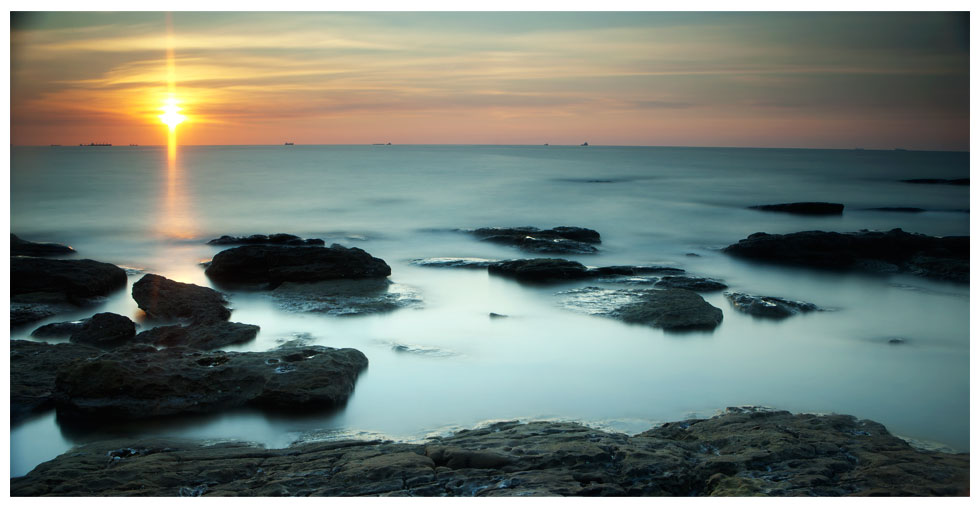
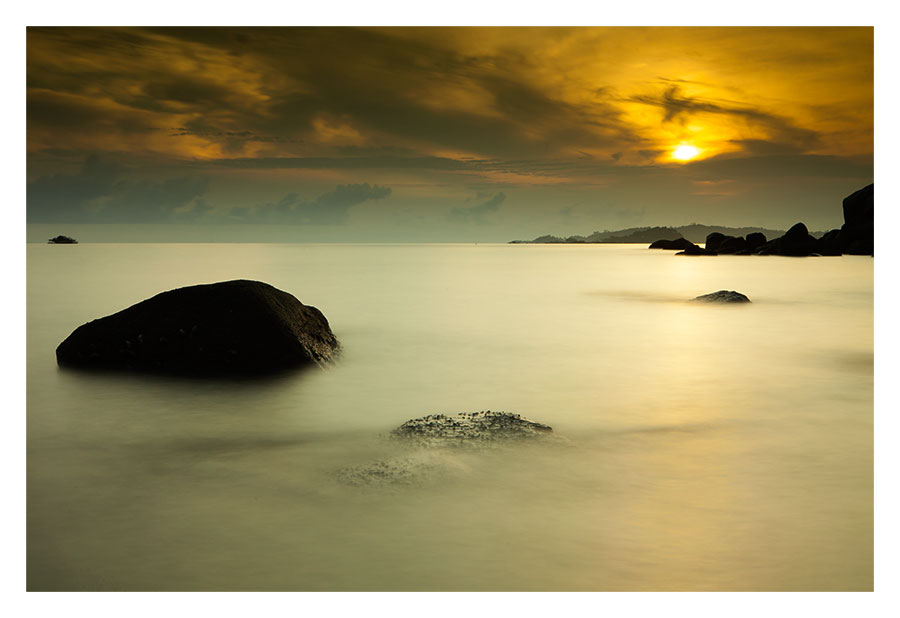
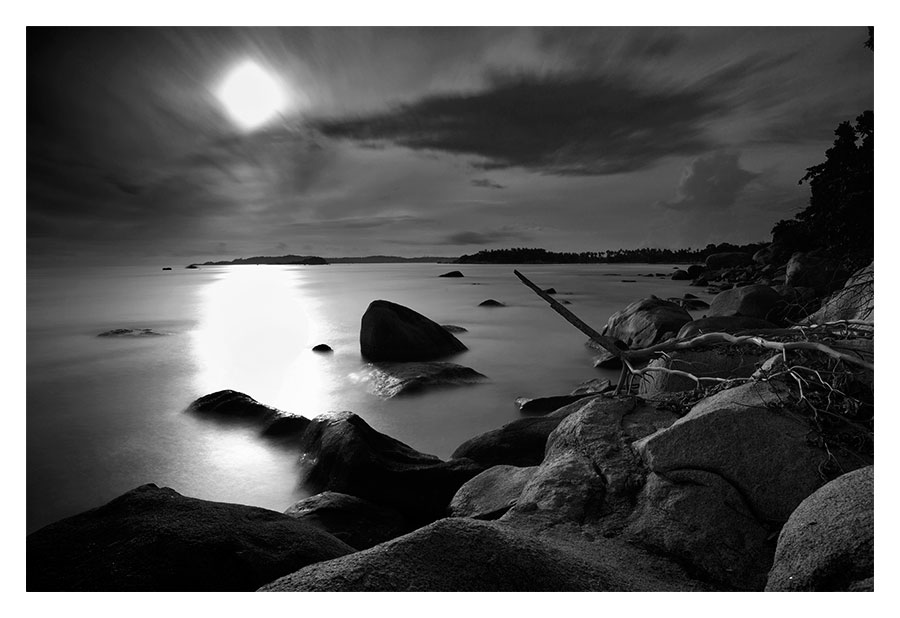
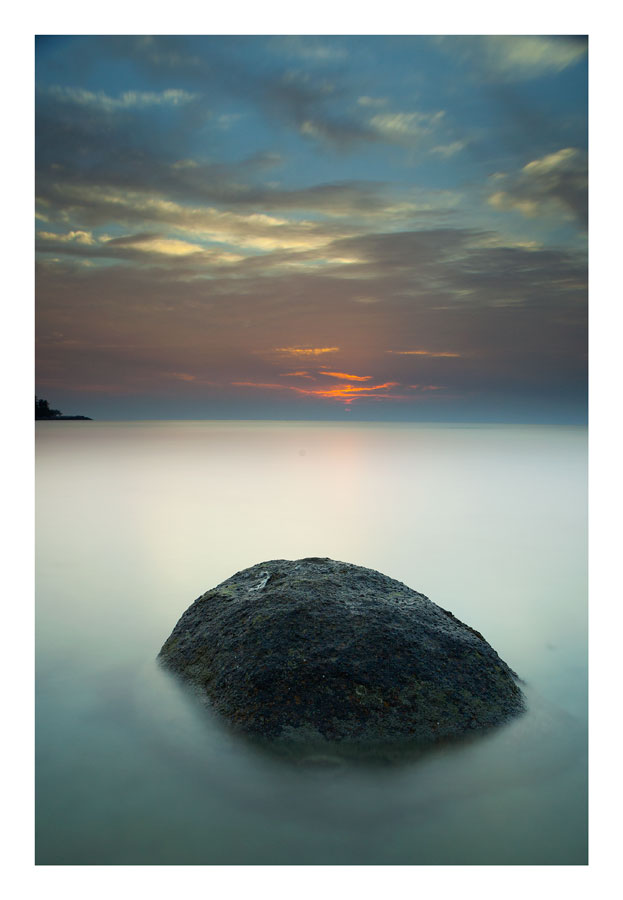
Landscape photographers shoots early morning and late afternoon till sunset. Basically these are the period when the sky colors are at their best. Its cooler in the morning and warmer during sunset. The direction of which you are shooting is also important. It is easier shooting along the direction of the sun as compared to shooting against the sun. However, I like the challenge of shooting against the sun and I really enjoy putting in my Lee STAR filter along with other ND/GND filters.
Plan your shots by determining the direction of sun light before gong to the sites. Try something simple in terms of subject selection and composition. Since you are shooting for long exposure, do make sure there are moving elements in your frame such as water, clouds, trees, etc.
Long exposure of sunset is very tricky because by the time you reach the end of exposure time, the amount of light reduces, thus, your picture may appear underexposed. I normally add 1 stop exposure time if the sun settles during the shot.
There are certain specific type of pictures that are best taken with long exposure technique, mostly Landscape or Nature photography. The concept of long exposure landscape photography is show the movement of elements in the picture that is none static for example clouds, water, grass, leafs, moving cars, etc, whilst static subjects remain razor sharp. Having said that, there is no restriction to use this technique for Landscape only. It can also be used for skyscrapers, highways, etc. My preference is on Landscape where there are elements of water and clouds where we have movements on both sides of the horizon.
Subjects
Look for static subjects within the two elements of water and clouds. Example : rocks, jetty structures, piers, poles, lighthouse, tree trunk, tires, trees, small island, etc.
Composition
Probably the most important part of long exposure photography is composition. It makes the difference between good and amazing shot. For a simple single subject like single rock, tree trunk, pole, etc, I just use a simple rule of third composition on either vertical or horizontal orientation. Simple yet amazing.
Some rocks formation has a line element where I love to choose a line that extends towards the horizon rather than towards the land. Simply because we want the contrast between rocks and the sky/sea/sun. The rocks are like pointing or moving towards the horizon. If you are lucky enough, you may have sky movement towards the horizon, thus, the final result will be rocks and clouds moving towards the same direction i.e. the horizon.
Again, keep it simple with rule of third on the horizon line. Try both vertical and horizontal. You may discover that the other orientation is much better. No harm of taking an extra shot!!!
Timing
Landscape photographers shoots early morning and late afternoon till sunset. Basically these are the period when the sky colors are at their best. Its cooler in the morning and warmer during sunset. The direction of which you are shooting is also important. It is easier shooting along the direction of the sun as compared to shooting against the sun. However, I like the challenge of shooting against the sun and I really enjoy putting in my Lee STAR filter along with other ND/GND filters.
Plan your shots by determining the direction of sun light before gong to the sites. Try something simple in terms of subject selection and composition. Since you are shooting for long exposure, do make sure there are moving elements in your frame such as water, clouds, trees, etc.
Long exposure of sunset is very tricky because by the time you reach the end of exposure time, the amount of light reduces, thus, your picture may appear underexposed. I normally add 1 stop exposure time if the sun settles during the shot.
Free Tutorial - Please scroll down to view our FREE Long Exposure Tutorial


WORK IN PROGRESS !!!!!
BUT DON'T STOP HERE. SCROLL DOWN TO SEE MORE SAMPLE IMAGES
Location
There are certain specific type of pictures that are best taken with long exposure technique, mostly Landscape or Nature photography. The concept of long exposure landscape photography is show the movement of elements in the picture that is none static for example clouds, water, grass, leafs, moving cars, etc, whilst static subjects remain razor sharp. Having said that, there is no restriction to use this technique for Landscape only. It can also be used for skyscrapers, highways, etc. My preference is on Landscape where there are elements of water and clouds where we have movements on both sides of the horizon.
Subjects
Look for static subjects within the two elements of water and clouds. Example : rocks, jetty structures, piers, poles, lighthouse, tree trunk, tires, trees, small island, etc.
Your Investment
Depending on how deep your pocket is, I will list down your options in filters investment. With this guide, you will at least have a rough idea the cost involved if you are to start shooting long exposure.
COKIN System - Probably the cheapest system available in the market. www.cokin-filters.com/ . Browse through their website to understand the system. But basically, the system required are similar to "FILTERS" section above. Here are the minimum items you would require:
1) GND 8 - 3 Stops Gradual ND - RM70
2) GND 4 - 2 Stops Gradual ND - RM70
3) GND 2 - 1 Stop Gradual ND - RM70
4) Filter Holder P Series - RM50
5) P Series Adapter Ring - RM45
The Cokin GND filters allows you to bring down the sky exposure gradually but you still need a solid ND to bring down stop values to 8 - 10 stops. There are two options of easily available circular ND filters in the market. These items are proven reliable and do not cause much colour distortion in your final image i.e. HOYA ND400 and B+W ND1000.
HOYA ND 400 - 8 to 9 Stops Neutral Density Circular Filter - RM380 for 77mm filter size. May cost cheaper for smaller filter diameter.
B+W ND1000 - 10 Stops Neutral Density Circular Filter - RMTBA