page contents


©2009 sanfreelancephotography.com. All rights reserved.
Disclaimer | Privacy | Copyright | Areas Covered | Contact
© 2009 sanfreelancephotography.com. All rigths reserved
© 2009 sanfreelancephotography.com. All rigths reserved
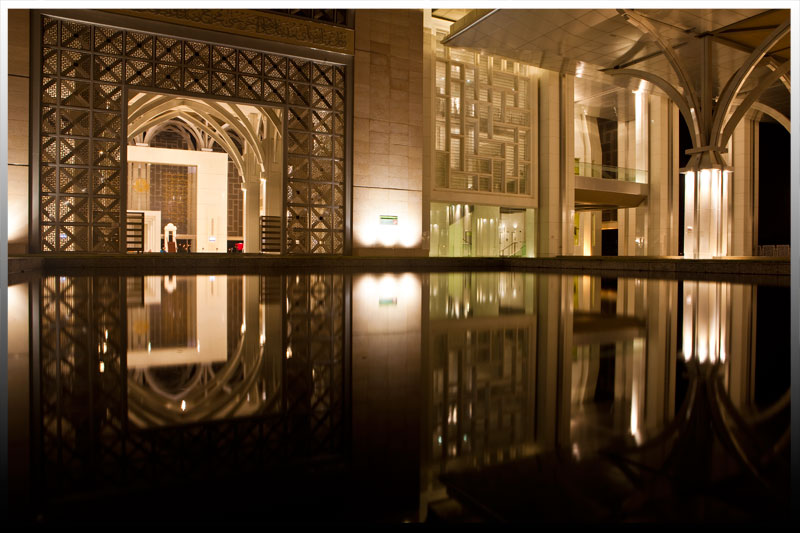
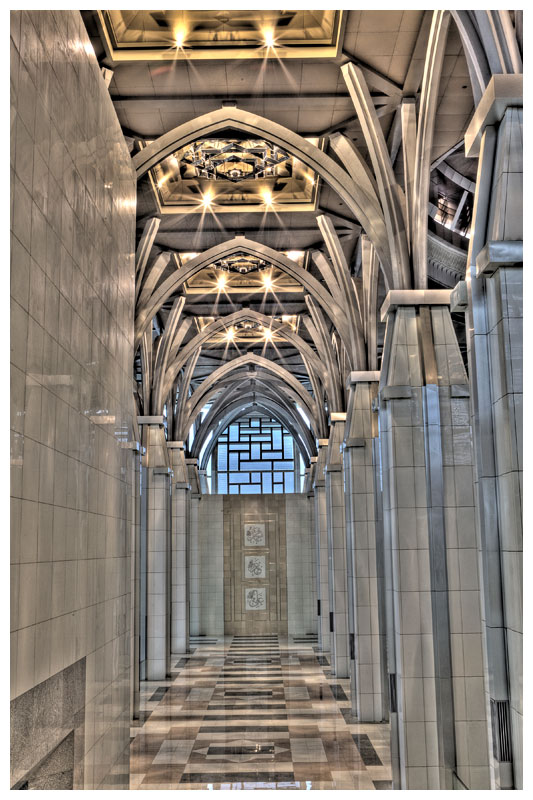
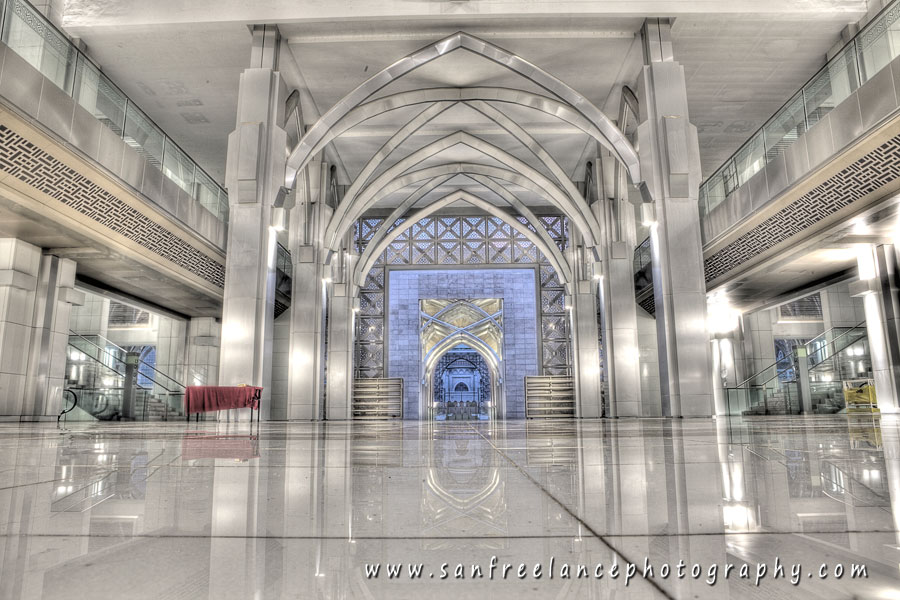
Sultan Mizan Mosque
Fantastic Architectural Design!!!
Sultan Mizan Mosque is the newly completed landmark in Putrajaya, located just behind the Putrajaya Holdings building. I heard about the completion and waste no time coz when they are officially announced, the management will have strict "outside mosque" photo rules such as those with the main Putrajaya Mosque.
I took the opportunity to shoot anything on site including tripod shots exactly in the middle of the mosque hall (while the security was not looking....).
If you wish to have good night shots, I advise you be there by 6.00 am. You will have at least 50 mins window to capture night shots. If you are non-muslim, you can still take your shots from outside the praying hall.
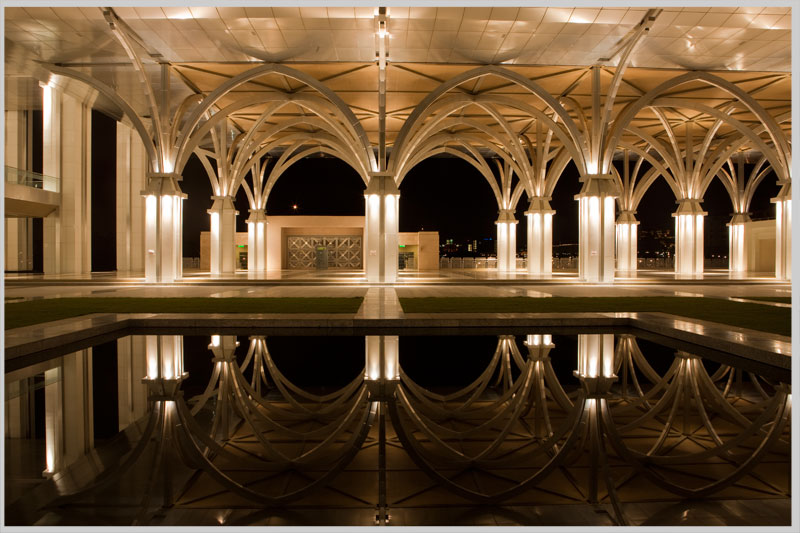
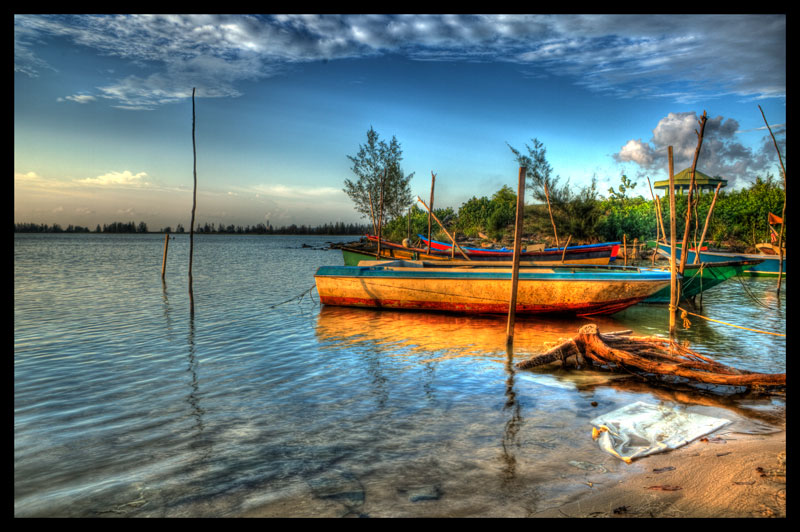
I always love night photography with water reflection. The moment I saw the pool in front of the mosque, I was so excited and quickly set up my tripod. The first photo is my favorite. I wanted to see everything clearly so I took a single exposure shot in Av mode, ISO 100, f22, 13s, WB 4850K.
Not HDR. I like it as it is!
Sultan Mizan Mosque is the newly completed landmark in Putrajaya, located just behind the Putrajaya Holdings building. I heard about the completion and waste no time coz when they are officially announced, the management will have strict "outside mosque" photo rules such as those with the main Putrajaya Mosque.
I took the opportunity to shoot anything on site including tripod shots exactly in the middle of the mosque hall (while the security was not looking....).
If you wish to have good night shots, I advise you be there by 6.00 am. You will have at least 50 mins window to capture night shots. If you are non-muslim, you can still take your shots from outside the praying hall.
I always love night photography with water reflection. The moment I saw the pool in front of the mosque, I was so excited and quickly set up my tripod. The first photo is my favorite. I wanted to see everything clearly so I took a single exposure shot in Av mode, ISO 100, f22, 13s, WB 4850K.
Not HDR. I like it as it is!
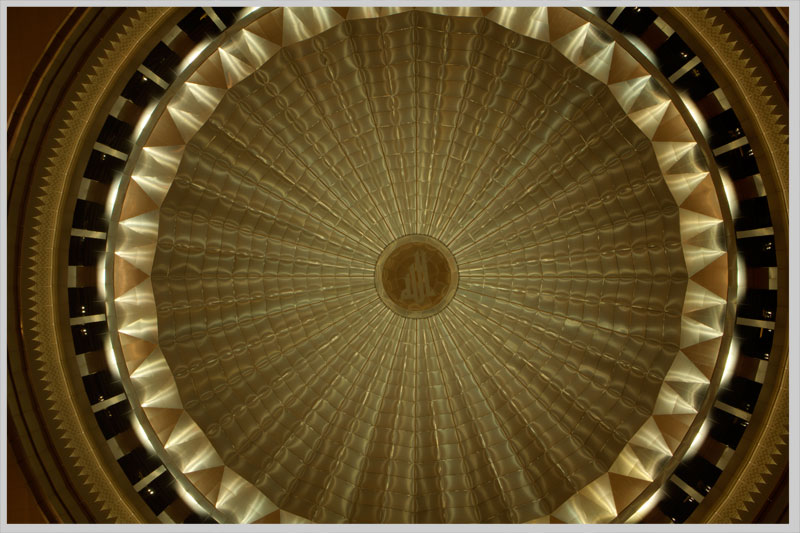
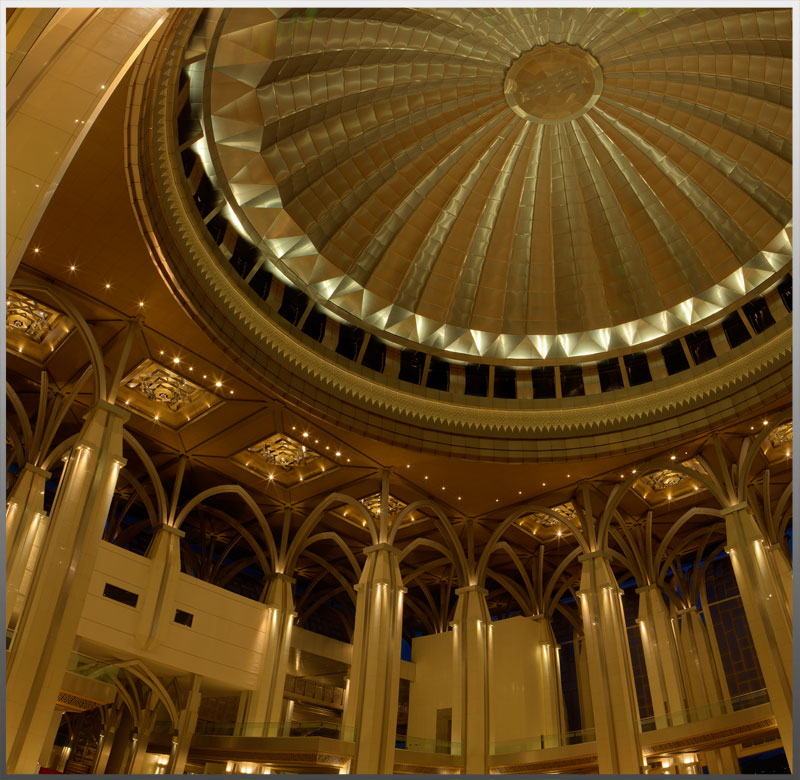
This shot was taken from the centre of the praying hall exactly below the dome. This is HDR image from 3 exposures of -2, 0 and +2 EV. Av mode, f22, 0.4s, WB 4850K. Tone Mapped in Photomatix with Tone Compressor.
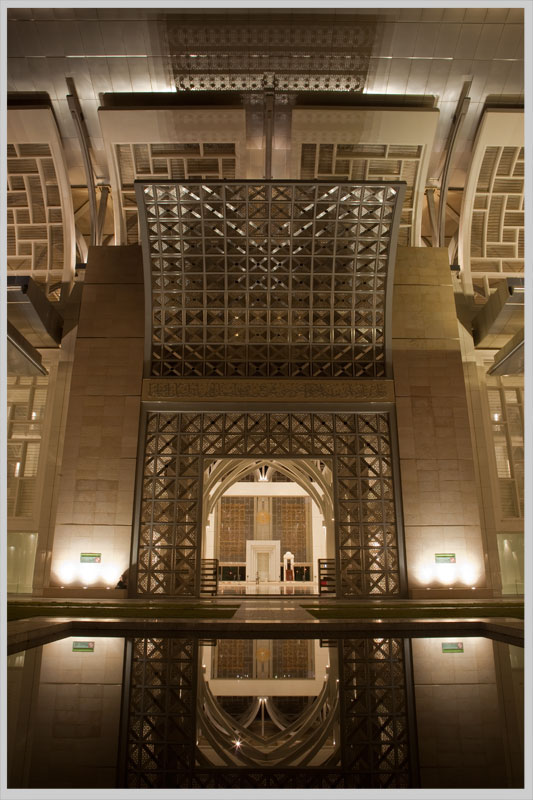
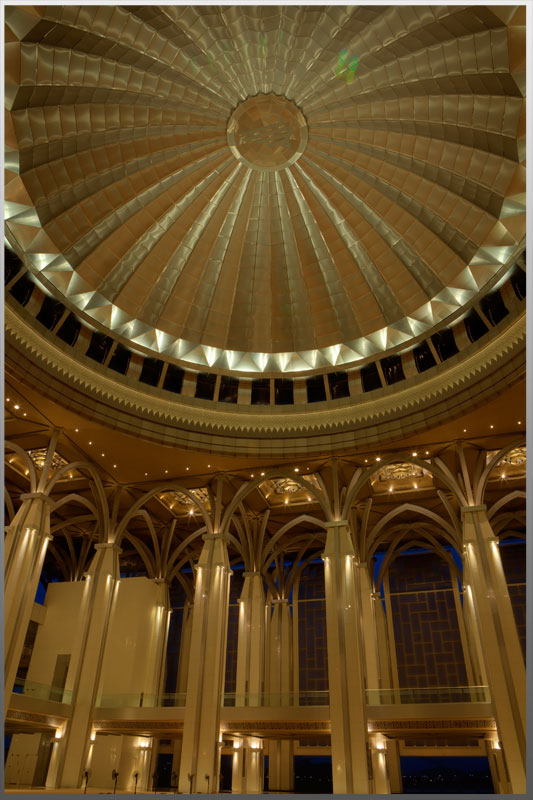
Two HDR images processed in Photomatix Tone Compressor and merged in PS.
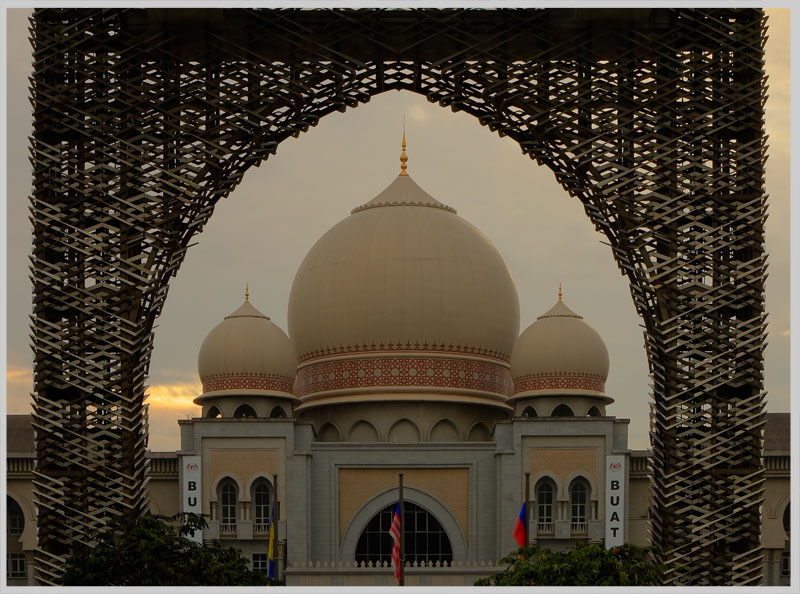
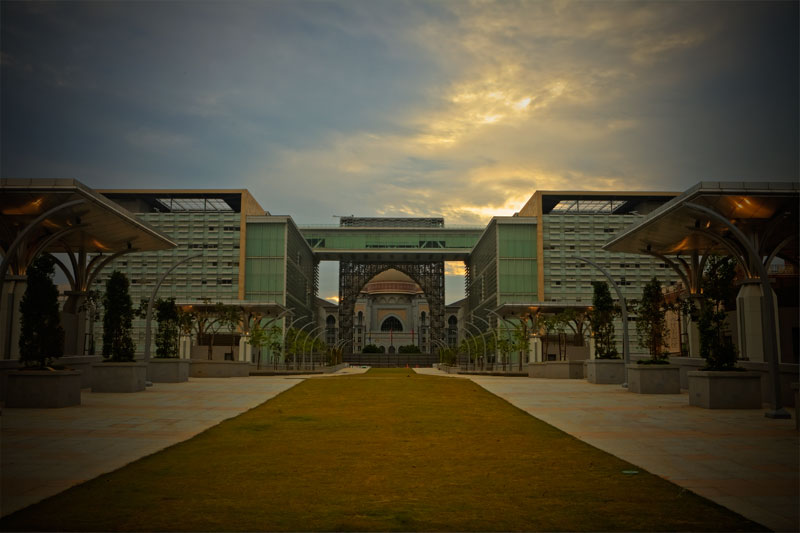
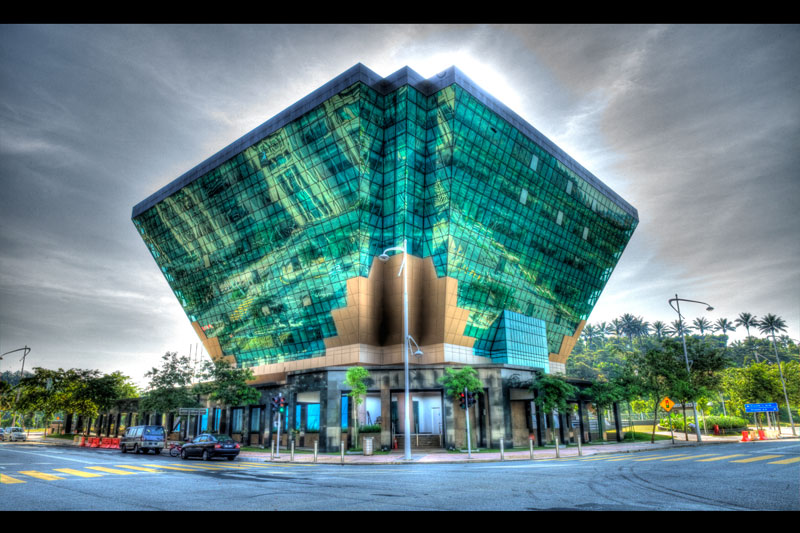
HDR Image from 3 exposures taken at about 7.20am. View taken from in front of the mosque entrance. You can see the famous landmark of Putrajaya Holding's steel arc with Palace of Justice domes. Photomatix Tone Compressor
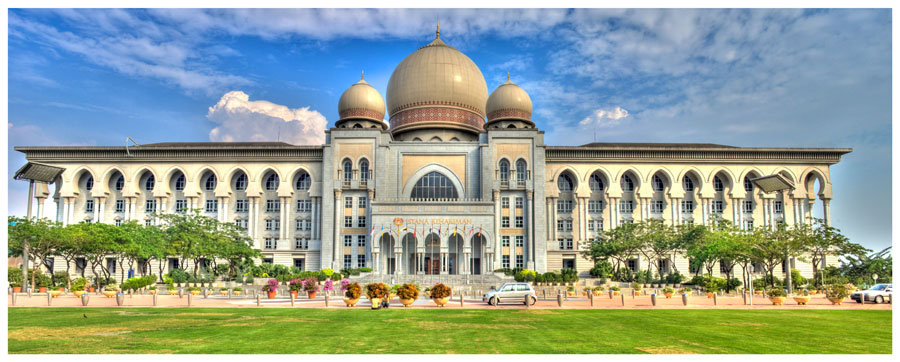
Palace Of Justice - HDR with -2,0,+2 EV Tone Compressor Photomatix
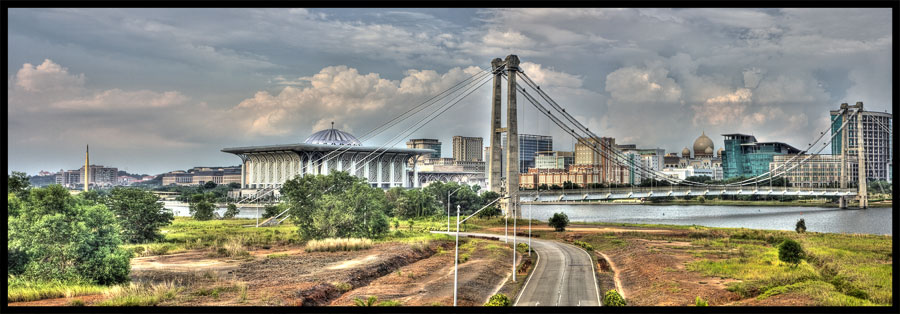
This is panaromic view of Putrajaya taken from a bridge near Putrajaya Convention Centre. Three scenes were taken with -2,0,+2 EV for each scene. Each scene processed separately in Photomatix but using the same Detail Enhancer setting. The 3 HDR images later merged in CS4. Canon 5DMKII, EF 24-70mm f2.8, Av Mode F11, ISO100.
Same method as the previous image except that I was using Canon TSE 24mm f3.5. The advantage was that I did not rotate my camera to get the left and right portion of the building. TSE lens allows me to shift the lens to the left and right to capture more area which otherwise impossible for normal lense.With normal 24mm lense, you could only capture 70% of the buildings area from the centre. Thus, you will have to rotate the camera similar to taking panaromic shots. When you merged in CS4, geometric distortion will be too obvious and you will need to crop your image.
BEFORE - Image at 0EV in grayscale.
AFTER - 0,-2,+2 EV shot processed in Photomatix Detail Enhancer. The images processed twice and blended in Photoshop CS4.
Original Image at single exposure
Image processed in Photomatix Detail Enhancer.
What is HDR?
There are plenty of good tutorial in the website for you to get an understanding of HDR. My definition of HDR is a method by means of digital manipulation to reveal image details which otherwise would be impossible to be revealed in a single exposure. Imagine a tree against a bright sunlight. Your eyes will have no problem in seeing the details under the tree or on the tree even with bright sunlight. Try taking a shot and you will get a Silhouette. Totally dark tree with overexposed sky which is not what your eyes are seeing. Well, your camera meters the light scene and try to compensate for the bright sky, which eventually causes the tree to be underexposed. In photography, you have to decide which part of the image that matters to you the most and get your camera to meter the light on that particular spot. Other areas of the image will be affected by that metering. In other words, your camera can only shoot one exposure and you have to decide whether to see what's on the tree or making sure there is no overexposed sky.
Because the sensor's ability is limited to one exposure, you need to capture many shots at different exposure to reveal the details from the highlight and shadows. Merge and process them in a dedicated software and get the details that you wanted. There you go! My explanation is simple and if you want to have more details, google HDR or get a good reference book.
The Process
I met so many and talked to many photographers who always tell me that HDR is simply taking 3 bracketed shots and merge in HDR software. If it is that simple, many HDR photographers will have to get a new job. Frankly, you need to de plenty of experiment to get it right. It is not as easy as just taking 3 bracketed shots. Here's my version of HDR Techniques and Process:
Analyze Scene - I will start by analyzing the scene because not every scene is good in HDR. The Sultan Mizan Mosque photo above is a good example.
This is a single exposure shot. You can feel the night mood. What could possibly better than this scene. So, HDR doesn't work for this. I like it this way.
How Many Shots ?
Some scene where light is evenly distributed like overcast sky on a building can be processed in HDR even with just a single file. Before I start shooting I will decide whether I want that scene to be in HDR. Then I will spot meter on the brightest highlight (in aperture mode) and get the shutter speed reading. Review the histogram making sure the no highlight (nothing touches the right histogram wall). If there is highlight, I will compensate to 1/3 EV, re-shoot and get the speed reading. Then, I'll spot meter on the darkest shadow and observe the histogram making sure no shadows. If any pixel luminance touches the left hand side of the graph, I will compensate 1/3 EV, re-shoot and get the speed reading.
Basically, you need to consistently be on aperture mode, fix focus point and and EV interval from the highest speed recorded to the lowest speed (based on the above speed data). You can shoot with 1EV interval or 2EV interval depending on the amount of details you require. Lower interval will give more details but sometimes not necessary. By doing, the above you will make sure that manage to capture details from highlight and shadow. If there is not enough details captured, you will have plenty of grains in your HDR image.
REMEMBER : Shoot in Aperture Mode, Fix ISO and Fix focus point. Most importantly.... on tripod.
The next process is Post Processing................... Coming Soon.