
Disclaimer | Privacy | Copyright | Areas Covered | Contact
© 2009-2010 sanfreelancephotography.com. All rigths reserved
© 2009-2010 sanfreelancephotography.com. All rigths reserved
Creating Vignette Effect, Split Tone Image and Simple Photo Frame

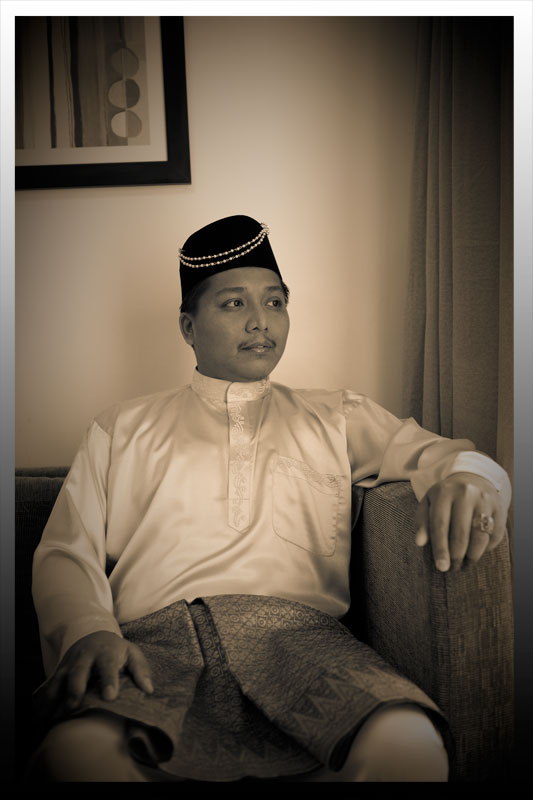
Original Photo
After Editing
In this tutorial we will reveal to you how to achieve stunning grayscale image in split tone with just some simple editing in Adobe Camera Raw. We will also show how to design a simple yet elegant looking photo frame.
Firstly, you need to have your own photo that will look nice in grayscale, preferably photos with good contrast of background and subject. OK ! Lets begin!!!!
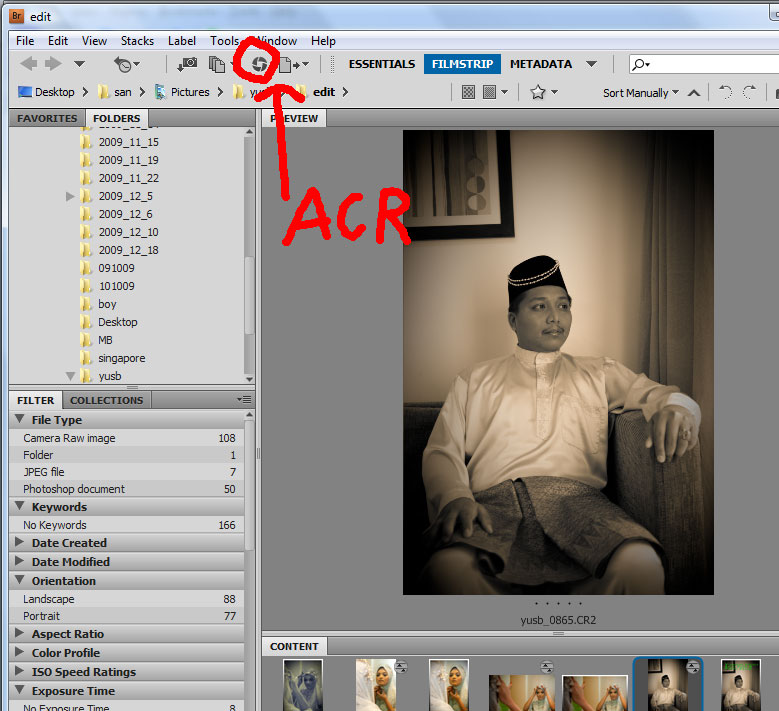
1- Select the image from your Adobe Bridge and open it in Camera Raw.
2- If you have not done color & lighting adjustment you do it in the Basic Tab.
3- Click the HSL Tab and "Check" on the grayscale box. Your image will turn to B&W.
Firstly, you need to have your own photo that will look nice in grayscale, preferably photos with good contrast of background and subject. OK ! Lets begin!!!!
1- Select the image from your Adobe Bridge and open it in Camera Raw.
2- If you have not done color & lighting adjustment you do it in the Basic Tab.
3- Click the HSL Tab and "Check" on the grayscale box. Your image will turn to B&W.
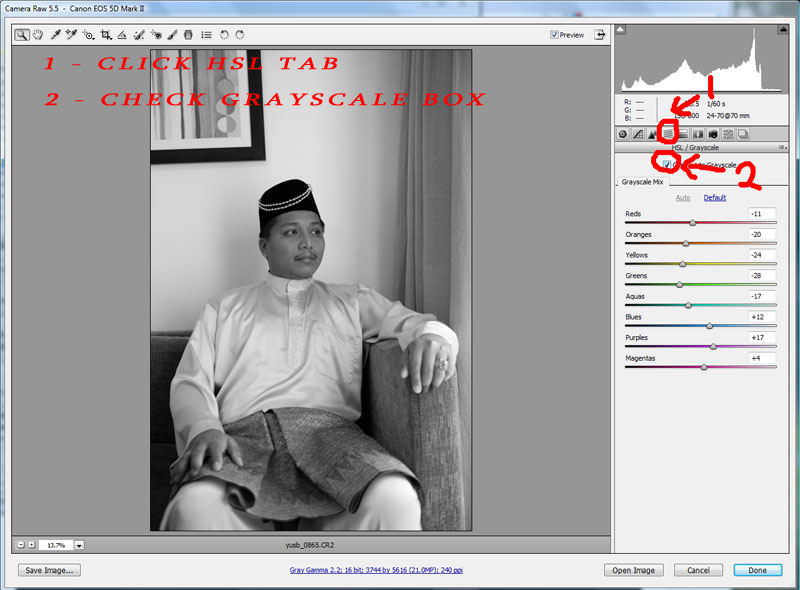
By clicking the Grayscale Box of the HSL Tab, the image turns to B&W.
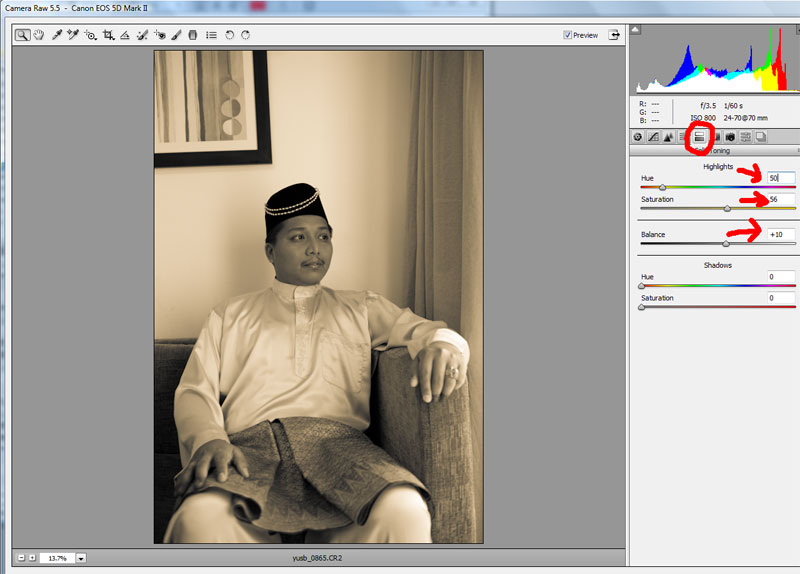
Split Tone
This will create the classic color. Enter the value of HUE 50, Saturation 56 and Balance 10.
This will create the classic color. Enter the value of HUE 50, Saturation 56 and Balance 10.
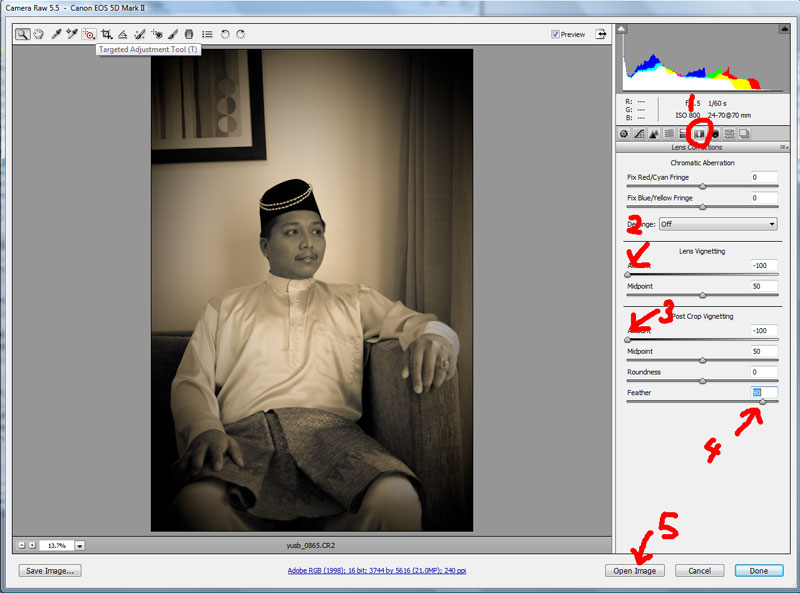
Creating Dark Edges Effect
1 - Open Lens Correction Tab
2- Slide Lens Vignette and Post Crop Vignette to -100. This will create maximum Vignette effect on the edges.
3- Increase the Feather value to about 90. This will soften the dark edges towards the centre.
4- Open the Image in CS4
1 - Open Lens Correction Tab
2- Slide Lens Vignette and Post Crop Vignette to -100. This will create maximum Vignette effect on the edges.
3- Increase the Feather value to about 90. This will soften the dark edges towards the centre.
4- Open the Image in CS4
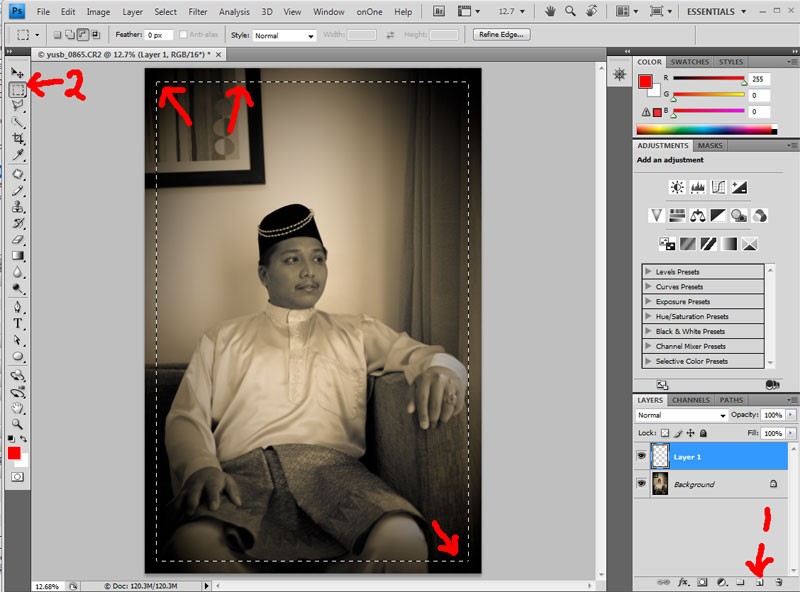
Simple & Elegant Photo Frame in CS4
It is not necessary to add in photo frame but it does look nicer to have it. What we have here is a very simple yet elegant looking photo frame. Alternatively, you can purchase any of the plug-in for CS4 such as OnOne Photoframe.
If you haven't sharpen your photo, you can do so in CS4.
1- Click the New Layer button. We create a new layer because we do not want the frame to alter the original image.
2- Next, click on the rectangular marque tool. Create inner box starting from the upper edge. Try to make the size as accurate as possible. It will be weird to have different thickness of frame.
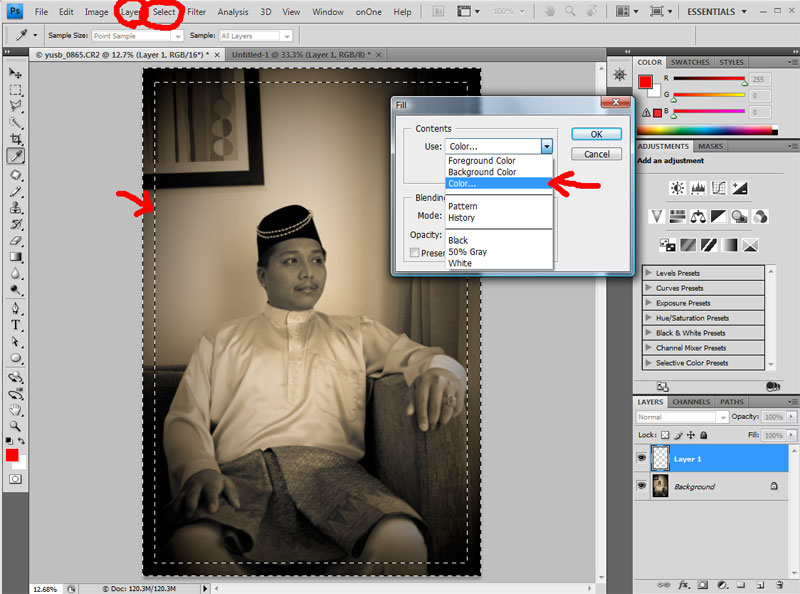
Click SELECT > INVERSE. You will see frame being highlighted by the dotted lines.
Click EDIT > FILL. Then, choose COLOR (in this example, White). Click OK.
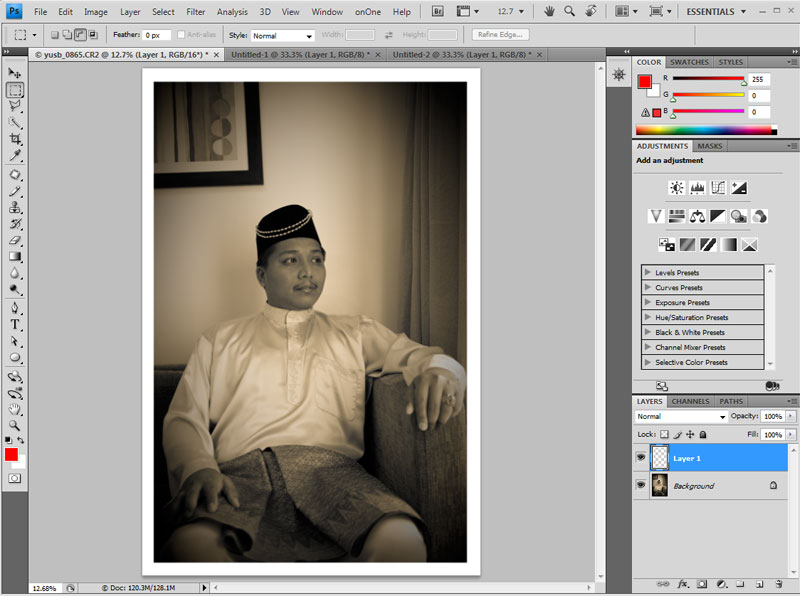
The frame will be filled with White Color.
To remove the frame selection click SELECT > DESELECT.
Click EDIT > FILL. Then, choose COLOR (in this example, White). Click OK.
The frame will be filled with White Color.
To remove the frame selection click SELECT > DESELECT.
Basically, the frame is complete. White frame is the most common frame color used. You can save your file or you can create simple gradient on the frame.
Click SELECT > INVERSE. You will see frame being highlighted by the dotted lines.
Click EDIT > FILL. Then, choose COLOR (in this example, White). Click OK.
The frame will be filled with White Color.
To remove the frame selection click SELECT > DESELECT.
Click EDIT > FILL. Then, choose COLOR (in this example, White). Click OK.
The frame will be filled with White Color.
To remove the frame selection click SELECT > DESELECT.
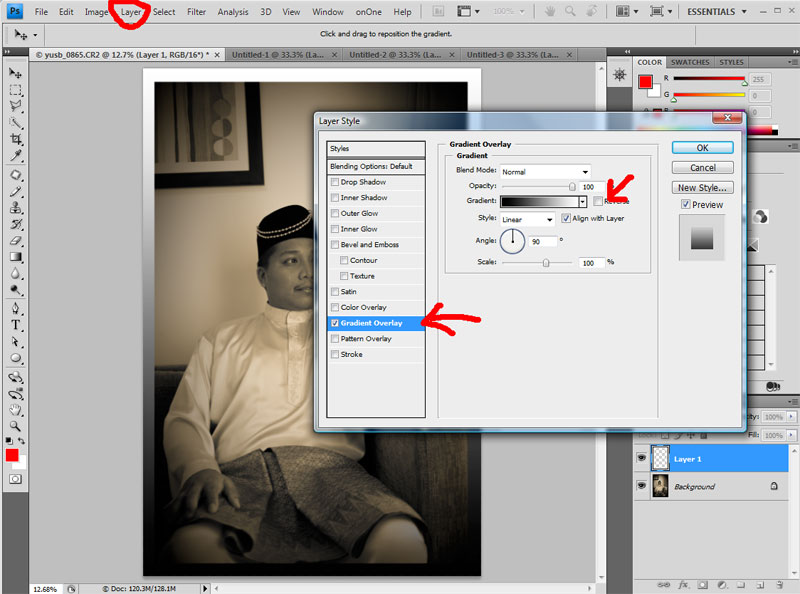
To create Gradient we need to change the layer style.
Make sure you are on the Frame Layer and not on the Background Layer.
Click LAYER > LAYER STYLE > BLENDING OPTIONS
In the Layer Style box, click Gradient Overlay. A dark gradient will appear in the frame.
If you like the dark gradient appearing on the top frame, check the Inverse Box.
Make sure you are on the Frame Layer and not on the Background Layer.
Click LAYER > LAYER STYLE > BLENDING OPTIONS
In the Layer Style box, click Gradient Overlay. A dark gradient will appear in the frame.
If you like the dark gradient appearing on the top frame, check the Inverse Box.
That's it. You are done! Now you can save your file.
1- First, save the file as psd, which is the layered file. You can always come back and change the layers or do more editing.
2- Then, resize the image accordingly before saving the file as JPG or for Web Devices.
1- First, save the file as psd, which is the layered file. You can always come back and change the layers or do more editing.
2- Then, resize the image accordingly before saving the file as JPG or for Web Devices.
Is this tutorial helpful? Help us improve this site for the benefit of others. Please send me your comments or feedback to
san@sanfreelancephotography.com
san@sanfreelancephotography.com
