Tutorial 1: Extracting Image Using Photoshop CS4
In CS3, there is an extracting plug-in tool bundled with the software but not in CS4. In the meantime, two of the most popular extracting plug-in tool available in the market (Fluid Mask 3 and Mask Pro 4.1) works just fantastic but the fact is that there is no perfect tool for extracting images. The difficulties are apparent when you need to extract images that have almost similar color with the background.
In the case of Fluid Mask, the algorithm work based on differentiating contrast from the image. User are to select which to keep and which to discard. Mask Pro 4.1 is different in the sense that it will differentiate colors for extraction. You have to choose colors to remain and colors to discard. With the magic brush, the unwanted colors will be extracted, leaving behind colors relevant to your image.
In the case of Fluid Mask, the algorithm work based on differentiating contrast from the image. User are to select which to keep and which to discard. Mask Pro 4.1 is different in the sense that it will differentiate colors for extraction. You have to choose colors to remain and colors to discard. With the magic brush, the unwanted colors will be extracted, leaving behind colors relevant to your image.
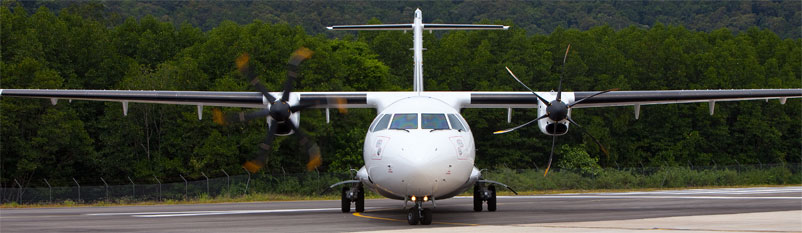
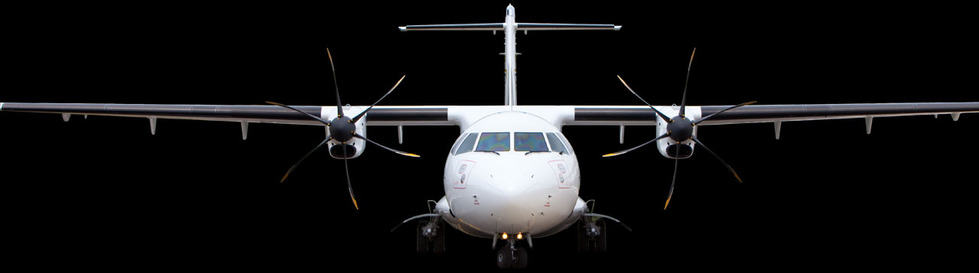
If you look at the demo shown in their website, extracting using their tool is so easy that you will be tempted to purchase it. The fact is that the example image they have selected was that of clear contrast and clear color difference with background. That makes extracting so easy and fast. But what about images with almost similar or similar background color? Well, accept the fact that these tools are not designed for such task, they are not perfect. You will have to rely on the old style of "Lasso Tool". Here is an example of a plane with a dark background of trees including dark shadows. Have a look at the propeller in black against shadow background. Obviously, the best cutting tool just can't take the task. What makes it even difficult, the other propeller was still spinning creating movement image. Fluid Mask and Mask Pro can extract hair but can it extract this spinning propeller?
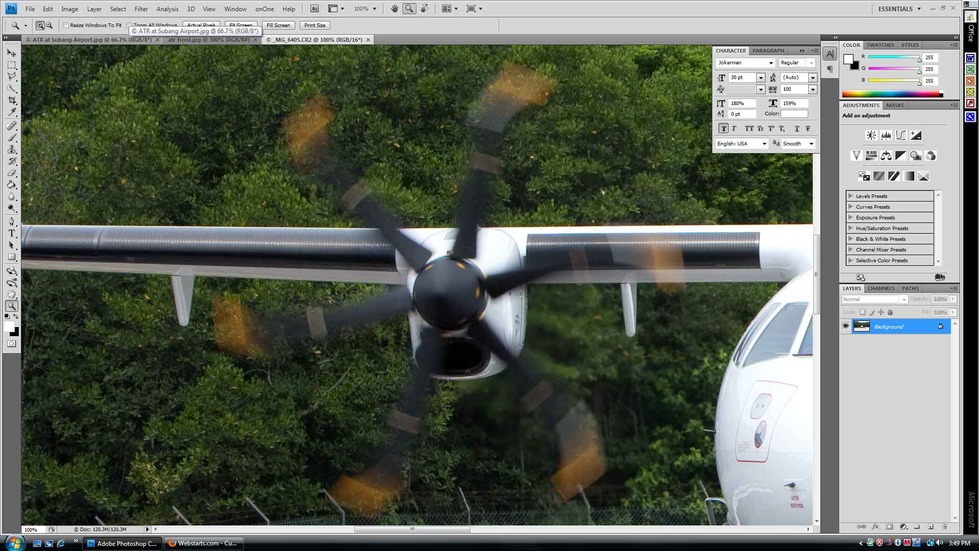
An attempt to extract the spinning propeller proves to be a failure because the color of the propeller is the same as the shadows of the trees. Cutting tool just don't work with this kind of scenario. See example of Mask Pro below:

The simplest solution to this problem is to just use "Lasso Tool" Work around the images even at the tires and rounded edges. Do not worry about the edges because they will not be obvious for regular or small print. Zoom your image for more accurate cutting.
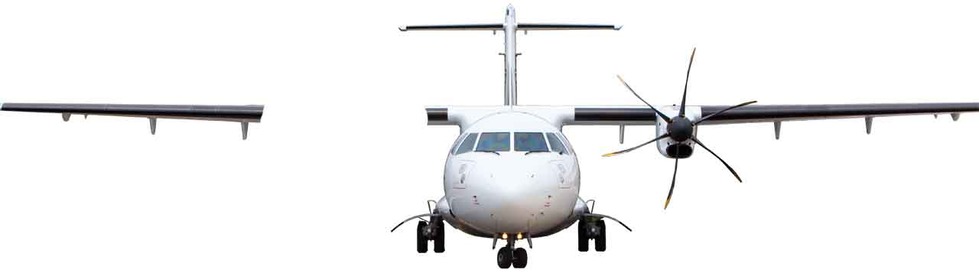
After extracting the background, I deleted the spinning propeller because it cannot be extracted using Lasso Tool. My intention was to to have the plane on a jetty, so the propellers doesn't have to spin at all. Use the same Poly Lasso Tool and copy the right propeller, paste it on another layer. Flip the copied propeller vertically and move it to the left wing. Using a brush tool will fine tune on the wings so that it looks real.
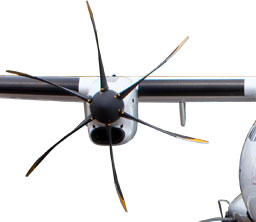
A close up of the left wing shows that they look as if it is the original left propeller.
I was only using 4 layers :- background color, extracted plane, copied propeller and brightness adjustment. Depending on the new background, the brightness of the plane need to be adjusted to make it look more realistic. It is kind of awkward to have a bright white color plane with a night scene or sunset background.
This is the final result. I use this extracted image on a blue dark cloud background that is available in windows vista sample image. I created a shadow on the jetty platform using another layer with about 30% transparency and overlay layer style.


Disclaimer | Privacy | Copyright | Areas Covered | Contact
© 2009-2010 sanfreelancephotography.com. All rigths reserved
© 2009-2010 sanfreelancephotography.com. All rigths reserved
Is this tutorial helpful? Help us improve this site for the benefit of other. Please send me your comments or feedback to
san@sanfreelancephotography.com
san@sanfreelancephotography.com
