Tutorial 2 : Correcting Perspective Using Photoshop CS4
When you stand close to a tall building and you want to capture the image of the entire building all the way to the top, you will have to point the camera upwards. The end result would be a building that is wide on the base and narrow at the top. But in actual fact, the building top is not narrow. This suppose to happen because the center line of the depth of field is parallel to the sensor plane.
In this tutorial I will show you how you can do simple correction of perspective using one of the filters in CS4. In the example below, I was standing in front of the tower exactly facing the tower center corner edge. As what other photographers would do, I pointed the camera upwards to cover the entire tower. The tower top looks narrow and far away. You can copy the original image to follow the steps explained in this section. (right click to copy original photo)
Step 1 :
- Open image in CS4.
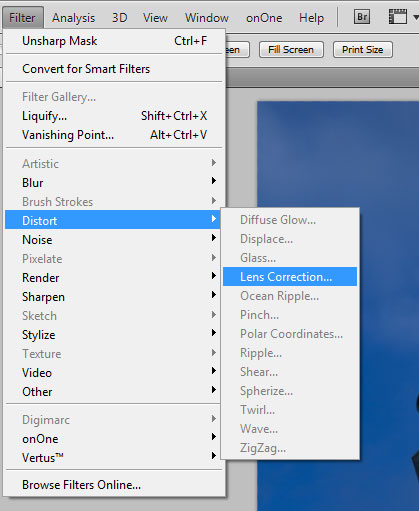
- Click Filter > Distort > Lens Correction
- Open image in CS4.
- Click Filter > Distort > Lens Correction
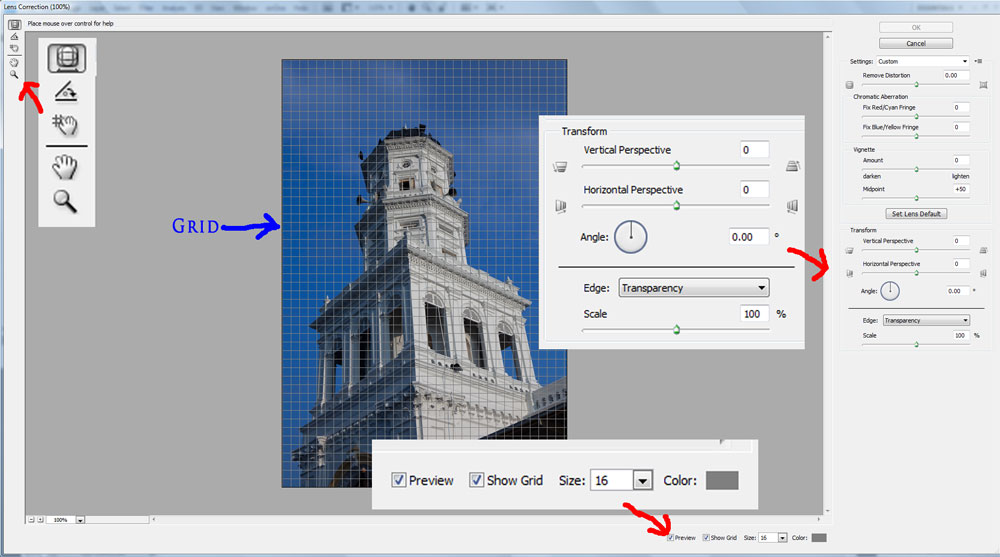
Make sure you have the Preview and Show Grid buttons ON.
The above window will appear. The toolbar on the left side are:
1- Top : Remove Distortion Tool - By clicking and moving your mouse, the image distortion can be removed. This tool is not easy to control and we shall leave it as it is at the moment as we do not need this tool in this tutorial. However, you can play around this tool and see how it can distort images (hint: try distorting your portrait).
2- The second tool is Straightening Tool. Draw a line along a strait horizon or supposedly a horizontal reference and the image will straightened.
3- The third tool is a move grid tool. It simply moves the grid without moving the image. Sometimes you need this tool to check for straight line of the image.
Step 3:
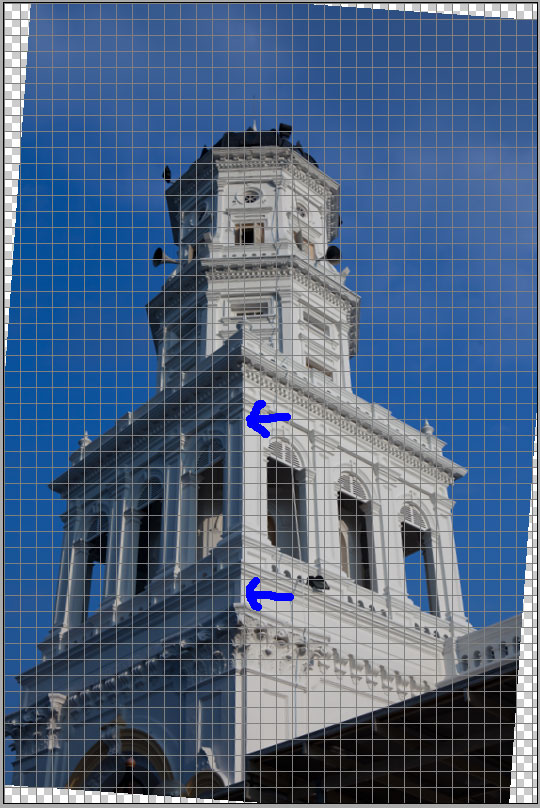
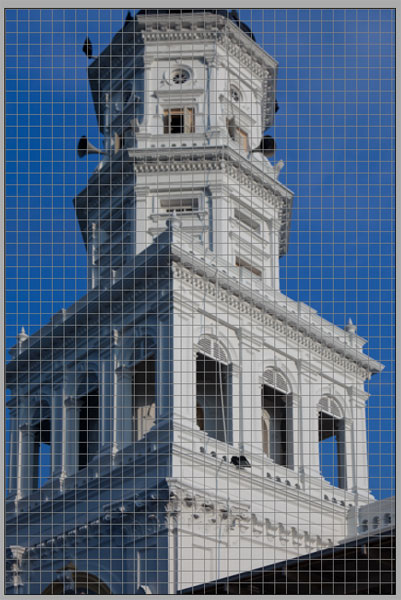
The next step is to straightened the left and right corners. This can be done by "pulling" the tower from its top while the base move backwards. In other words, you are trying the move the top part closer to you and moving the lower part further.
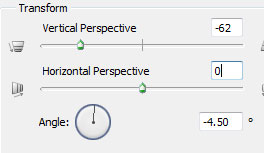
Move the vertical perspective slider to the left and notice the tower corners align with the vertical grid. Stop the slider when you get the desired effect. However, do not adjust too perfect. It is best to leave some perspective effect. In my case, -62 is good enough.
In some cases, you may need to adjust the horizontal perspective to correct the horizontal lines.
The next step is to straightened the left and right corners. This can be done by "pulling" the tower from its top while the base move backwards. In other words, you are trying the move the top part closer to you and moving the lower part further.
Move the vertical perspective slider to the left and notice the tower corners align with the vertical grid. Stop the slider when you get the desired effect. However, do not adjust too perfect. It is best to leave some perspective effect. In my case, -62 is good enough.
In some cases, you may need to adjust the horizontal perspective to correct the horizontal lines.
Step 2 :
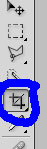
- Knowing that I was standing directly at the same line as the edge line marked blue, I need to adjust the building edge to align with the grid vertical line.
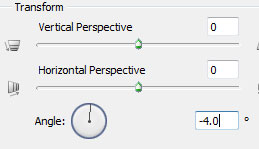
- Rotate the Angle knob or gradually insert an angle number in the box.
- In my case, -4.0 looks just fine.
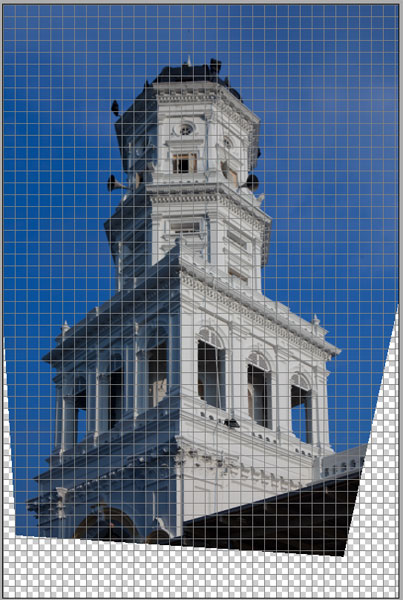
- The image was rotated to a -4.0 degrees and that the tower centre edge (blue) is aligned with the grid.
- Notice the left and right corners or the tower tilted. This needs to be corrected.
- Knowing that I was standing directly at the same line as the edge line marked blue, I need to adjust the building edge to align with the grid vertical line.
- Rotate the Angle knob or gradually insert an angle number in the box.
- In my case, -4.0 looks just fine.
- The image was rotated to a -4.0 degrees and that the tower centre edge (blue) is aligned with the grid.
- Notice the left and right corners or the tower tilted. This needs to be corrected.
Step 4 :
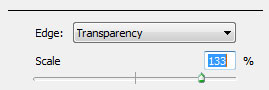
The final step is cropping which can be done within the Filter window or you can do it at the main window.
- Move the Scale slider to the right and stop when you have the image canvas fully covered with the image. Click OK.
I don't like the cropping so I decided to crop at the main window.
The final step is cropping which can be done within the Filter window or you can do it at the main window.
- Move the Scale slider to the right and stop when you have the image canvas fully covered with the image. Click OK.
I don't like the cropping so I decided to crop at the main window.

Disclaimer | Privacy | Copyright | Areas Covered | Contact
© 2009-2010 sanfreelancephotography.com. All rigths reserved
© 2009-2010 sanfreelancephotography.com. All rigths reserved
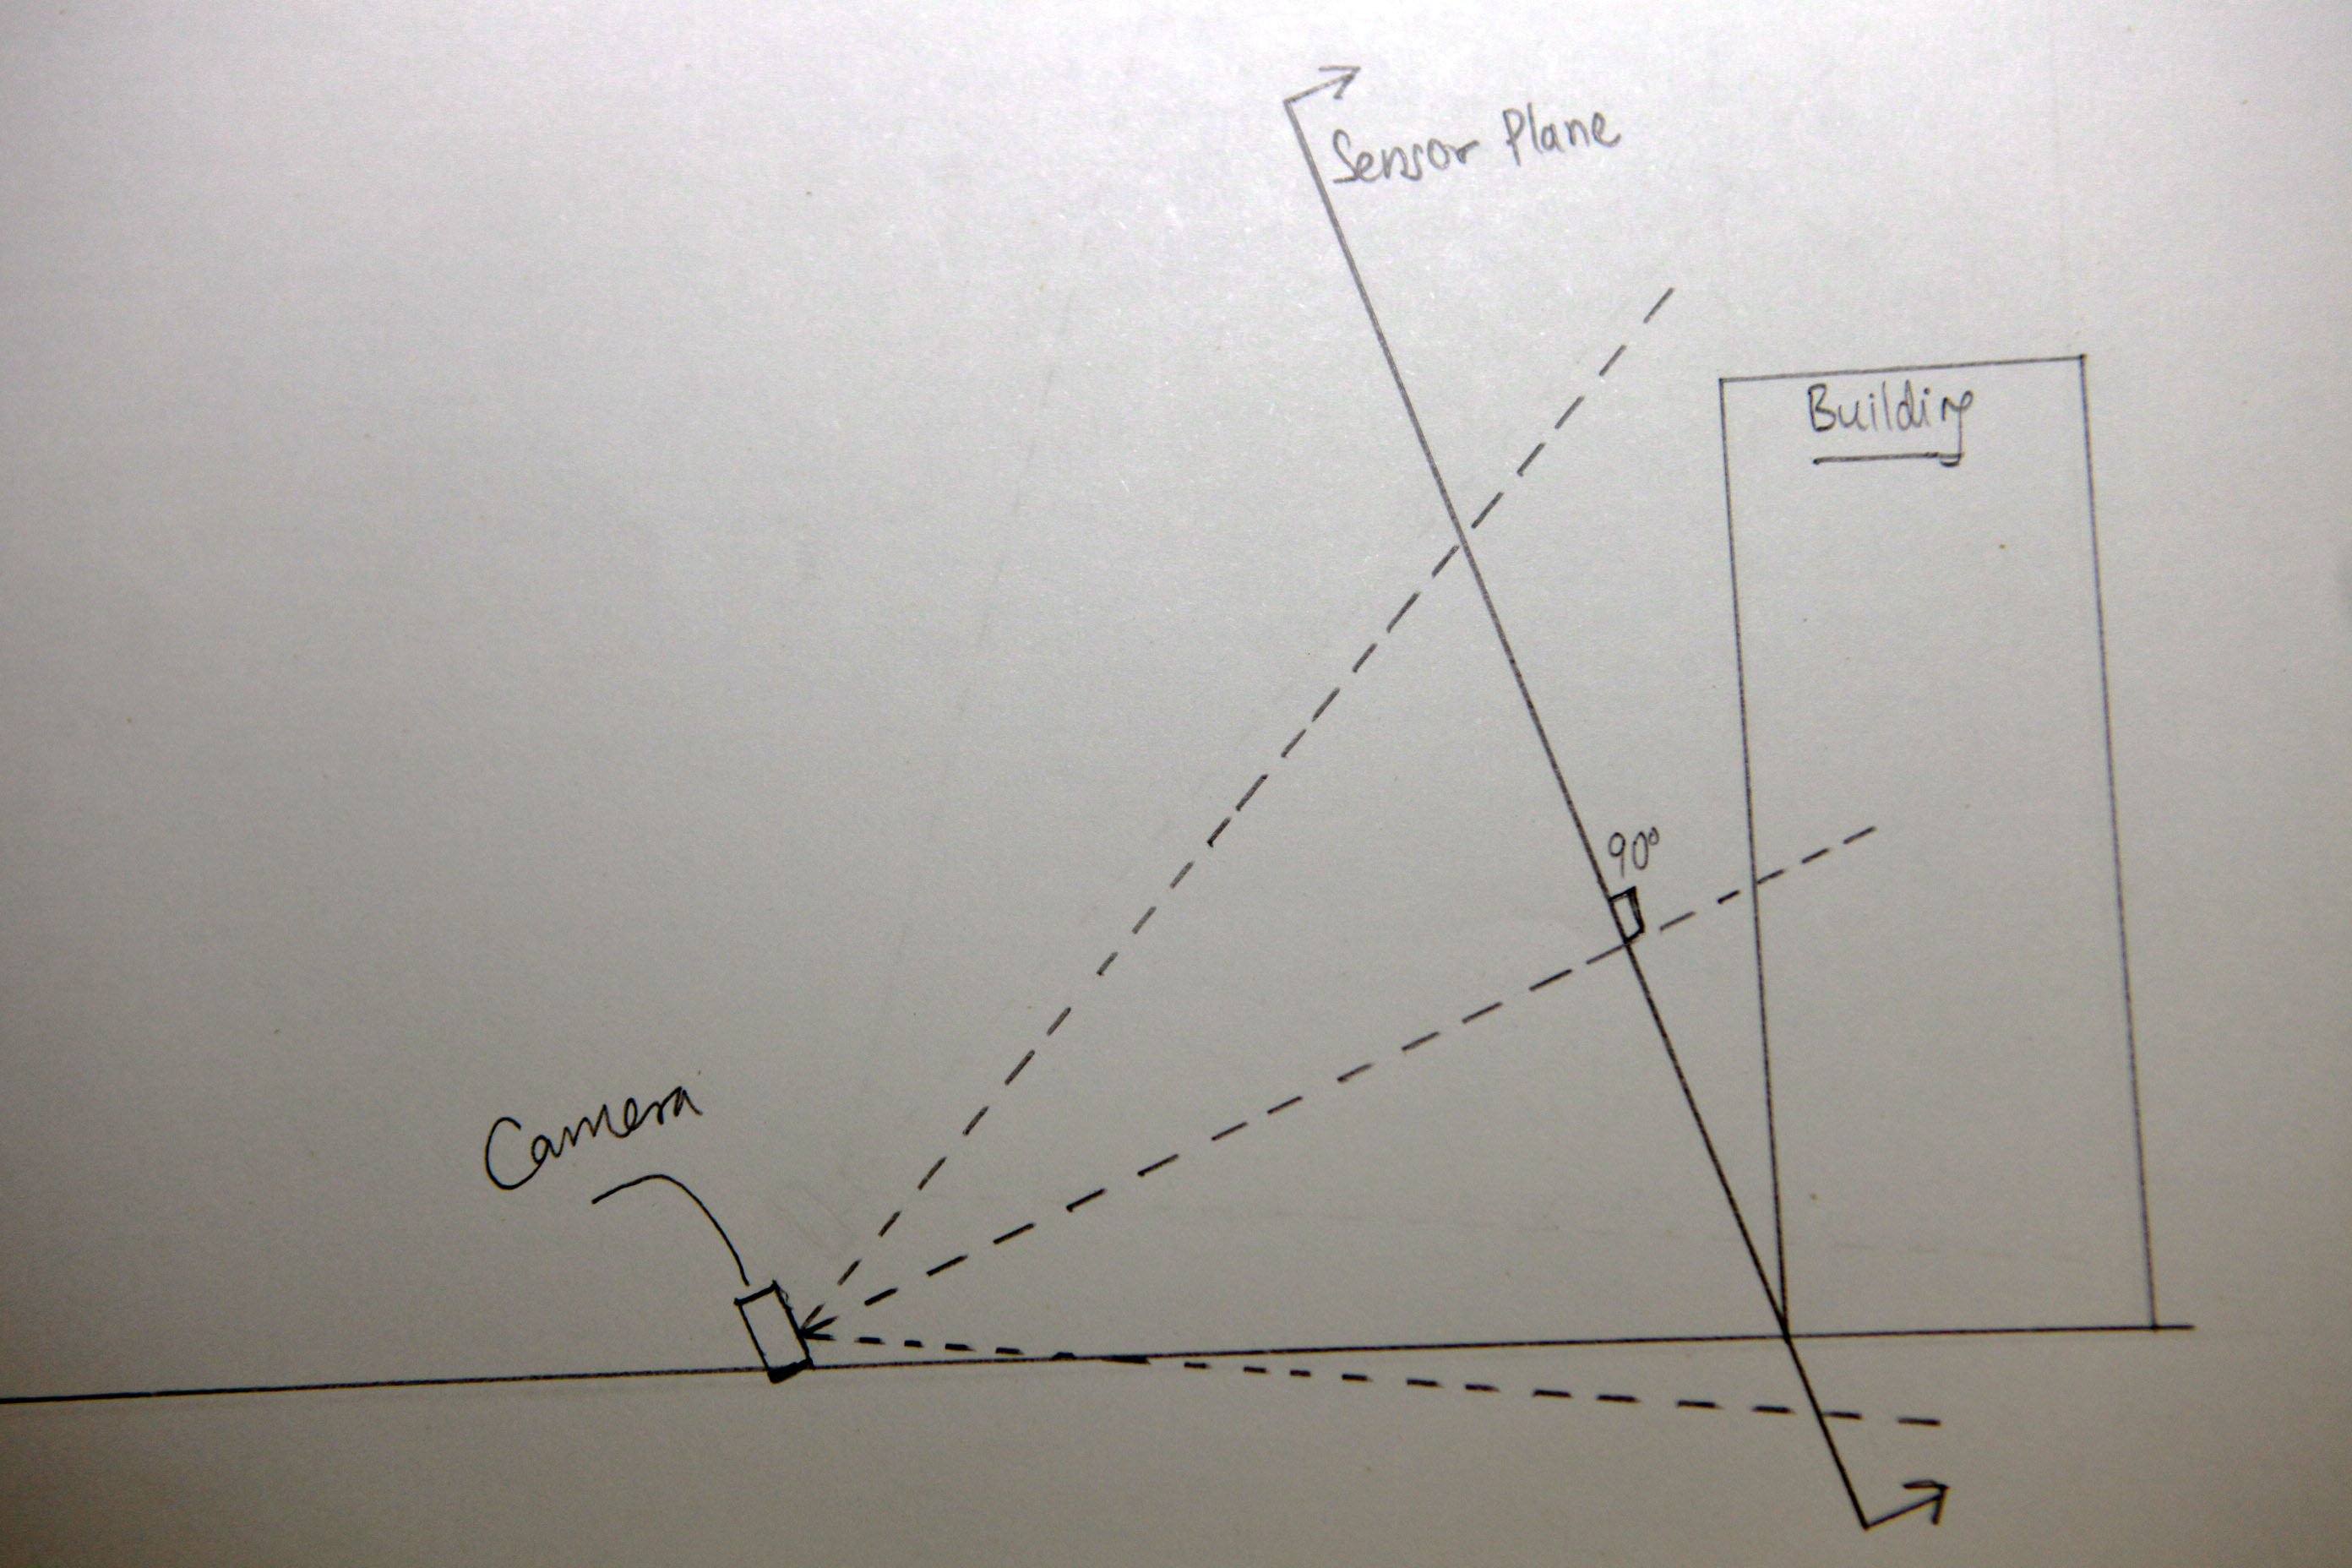
For normal day to day photography such perspective is acceptable but in the civil industry or architectural industry, too much perspective is not desirable. To compensate or correct the perspective, photographers would use a Tilt-Shift Lens. This lens is designed for flexibility specifically to change the depth of field plane by tilting, shifting and rotating the lens. Therefore, if you are capturing the same image of the earlier mentioned building using this lens from the same position, you may not have to point the lens upward. The lens can be adjusted so that the building top portion does not look narrow.
This lens can only be focused manually and only certain photographers would buy this lens. For those who do not have this lens but wish to make some correction to the perspective, CS4 can digitally manipulate the image to a certain limitation that it works almost like a real tilt-shift lens.


Before (Original)
After
Before
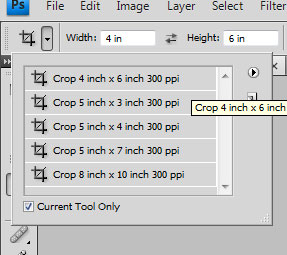
Step 5 :
- Click the Crop tool and select the crop size as shown.
- Crop the image. Click enter.
- Click the Crop tool and select the crop size as shown.
- Crop the image. Click enter.
FINAL IMAGE
Is this tutorial helpful? Help us improve this site for the benefit of others. Please send me your comments or feedback to
san@sanfreelancephotography.com
san@sanfreelancephotography.com
