Tutorial 4 : Selective Sharpening (Technique 1)
In this tutorial we will see how smart filters can be used to select specific areas in the image to be sharpened. It is a very simple step of a final image before your print or display in a website. In this case we assume you have done all the color correction and adjustment. Copy the original file or you can use you own file to follow this tutorial.
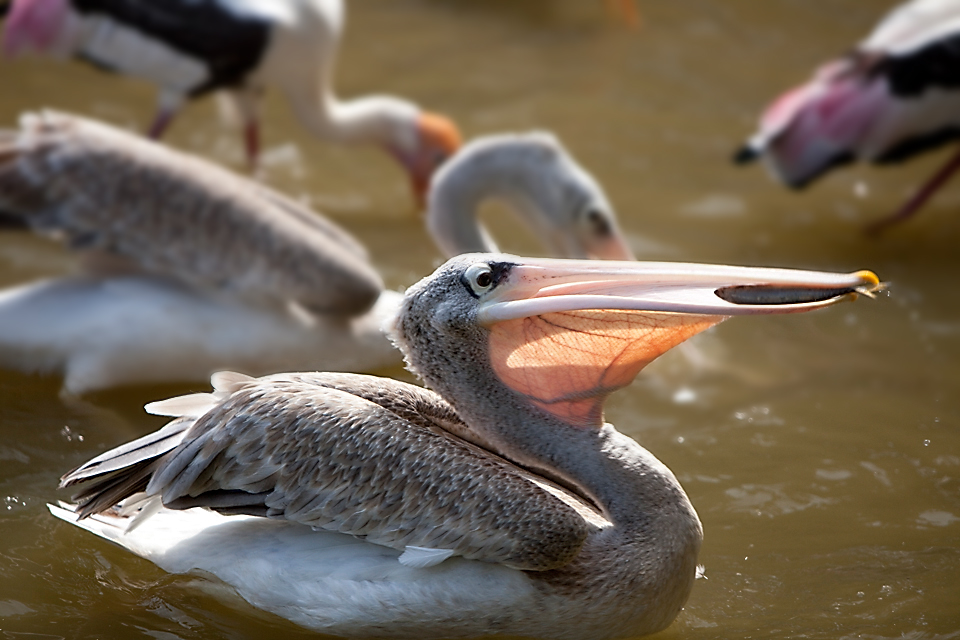
This technique is useful for nature photography where certain areas of the image like background of trees, mountain, etc, which suppose to took natural may look over manipulated by appearing razor sharp. In animal photography such as bird photography we want to sharpen the animal but want the background remains fuzzy. This is also important in portrait photography where the background should always remain blur.
This technique is useful for nature photography where certain areas of the image like background of trees, mountain, etc, which suppose to took natural may look over manipulated by appearing razor sharp. In animal photography such as bird photography we want to sharpen the animal but want the background remains fuzzy. This is also important in portrait photography where the background should always remain blur.
After
Before (Copy this file)
1- Open the file in CS4.
2- Convert the layer to a smart filter. Filter>Convert For Smart Filters.
3- Apply the sharpening. Filter> Sharpen>Unsharp Mask (you can use any sharpening mask you like but I prefer the Unsharp Mask.)
4- In the Unsharp Mask, adjust the slider accordingly by making sure not to over sharpen. Over sharpening can be seen when there are "halo" effect on edges. My setting was 120% Radius 1.7 Threshold 17. Clikc OK.
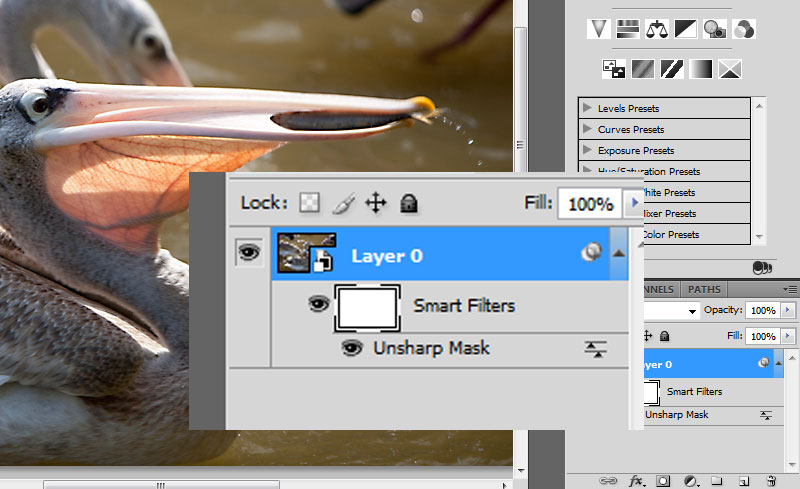
5- Now, you need to brush on the background of the bird. Click on the "Smart Filters" layer just below the original image layer.
6- Get a brush tool with black as foreground. Brush around the bird to reveal the original image background which was not sharpened. Adjust your brush size and hardness accordingly to get the best result.
7- If you can't see the effect. Try brushing on the bird and observe the sharpening being removed.
8- Try this technique with your own image. Do this frequently and have fun!
2- Convert the layer to a smart filter. Filter>Convert For Smart Filters.
3- Apply the sharpening. Filter> Sharpen>Unsharp Mask (you can use any sharpening mask you like but I prefer the Unsharp Mask.)
4- In the Unsharp Mask, adjust the slider accordingly by making sure not to over sharpen. Over sharpening can be seen when there are "halo" effect on edges. My setting was 120% Radius 1.7 Threshold 17. Clikc OK.
5- Now, you need to brush on the background of the bird. Click on the "Smart Filters" layer just below the original image layer.
6- Get a brush tool with black as foreground. Brush around the bird to reveal the original image background which was not sharpened. Adjust your brush size and hardness accordingly to get the best result.
7- If you can't see the effect. Try brushing on the bird and observe the sharpening being removed.
8- Try this technique with your own image. Do this frequently and have fun!
Is this tutorial helpful? Help us improve this site for the benefit of others. Please send me your comments or feedback to
san@sanfreelancephotography.com
san@sanfreelancephotography.com
Disclaimer | Privacy | Copyright | Areas Covered | Contact
© 2009 sanfreelancephotography.com. All rigths reserved
© 2009 sanfreelancephotography.com. All rigths reserved


Selective Sharpening (Technique 2)
Alternatively you can create a "bukeh" effect on the image to make the subject stand out. The few techniques to achieve a good result is as follows:
1- Upload the same original image as the first technique above.
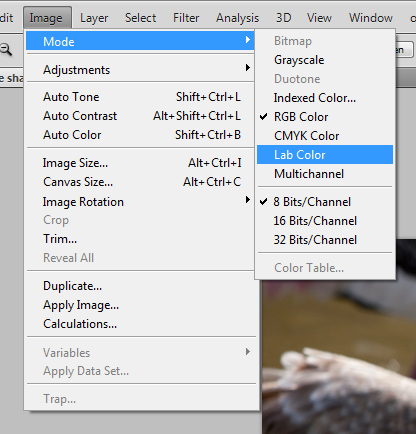
2- Change the mode of the image to Lab Color. Click Image > Mode > Lab Color
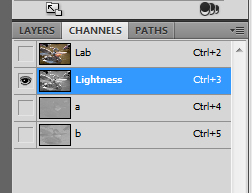
3- Click on the Channels layers and select Brightness
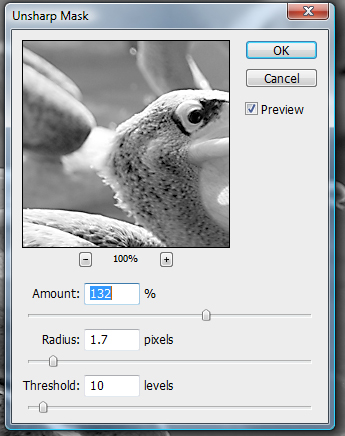
4- Sharpen the image Filter > Sharpen > Unsharp Mask. Apply the setting as shown below or adjust as you like.
1- Upload the same original image as the first technique above.
2- Change the mode of the image to Lab Color. Click Image > Mode > Lab Color
3- Click on the Channels layers and select Brightness
4- Sharpen the image Filter > Sharpen > Unsharp Mask. Apply the setting as shown below or adjust as you like.
5 - Then, convert the image to smart filters similar to Technique 1.
Filter > Convert for Smart Filters.
6 - The next step is to blur the image using Filter > Blur > Gaussian Blur. Use around 4.0 radius and click OK. The image will appear blur and you can see the smart filters just below the original image layer.
7 - Next step is to paint on the main bird so that it appears sharp compare to the rest of the image. Similar to Technique 1, select brush tool with Black as foreground and White as background.
8- Do fine adjustment on the main bird using the same steps as Technique 1. Remember to also brush on the water at the same platform level of the main bird to make it more realistic. It will look odd to have the water which the bird in floating on appears blur.
After
Before (Copy this file)
